Switching back to cooking, my second choice between that and baking, I opened up The Food Lab by J. Kenji Lopez-Alt again and decided to continue with the vaguely Italian/Western cuisine streak from the last time I cook and make shrimp scampi and pear arugula salad…with an added bonus of hitting the fruit tart I mentioned last week.
Shrimp Scampi
Whenever I think of the word, “shrimp”, I think of this one kid from my church had one line from our Christmas production, which was, “Whaaaat, you never had SHRAMP before?” Forever legendary.
One thing that I did not know was that “scampi” is just the Italian word for shrimp, specifically cooked with five ingredients: garlic, butter, olive oil, white wine, and parsley. So, “shrimp scampi” is literally shirmp shrimp, which I find hilarious. I also haven’t cooked much with shrimp before in the past so I thought this would be a good exercise for me.
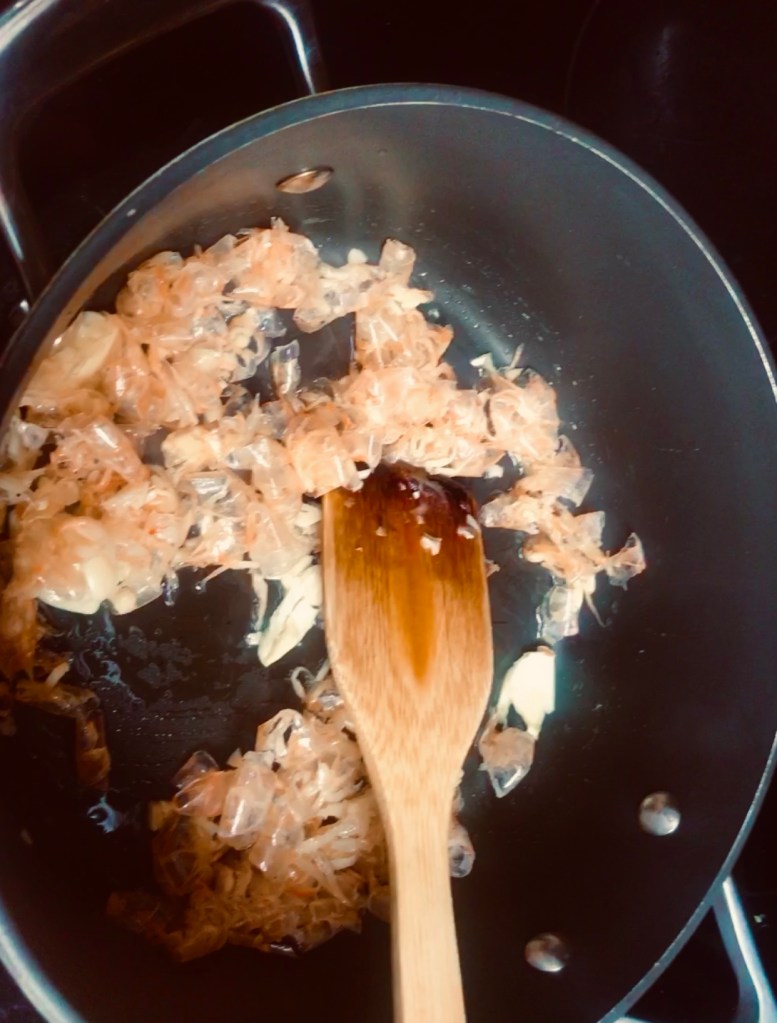
Another shrimp fact is that unless you want shrimp heads for extra flavor/appearance, try to always go for headless shrimp. Apparently, shrimp heads contain enzymes that start breaking down the flesh of shrimp upon death–leading to mushy texture shrimp.
Unfortunately, I forgot to take photos this time around and the end product didn’t look that great/Instagram-worthy so I only have this subpar photo to share.
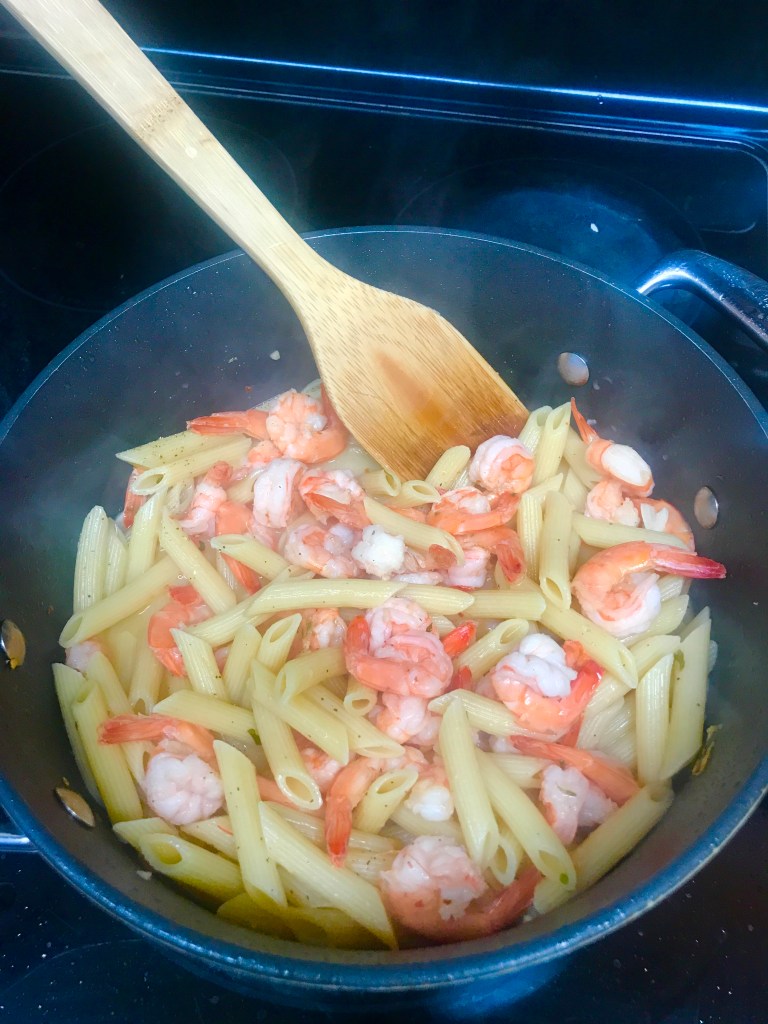
So yes, this recipe turned out a little bland for my taste before I added a bunch more seasoning. Fortunately, I could think of a couple reasons.
- I didn’t cook the garlic in the right order. Similar to how there are multiple ways to cook/saute/caramelize onions, there are multiple ways to cook garlic and the form they’re cooked in matters. This recipe called for three forms of garlic: smashed cloves, sliced cloves, and minced cloves. Smashed cloves are meant to be cooked like you’re caramelizing onions–slowly to the point where there’s a sweetness to it that can pair well with shrimp shells. I did not care much for that and accidentally paired the shells with the minced cloves, when they were meant to go with the shrimp. As a result, I probably did not extract the garlic’s full potential when cooking it.
- Not enough garlic. I forgot the cardinal rule of cooking with garlic: Add as much garlic as you want with reckless abandon to the point where it is almost offensive to the recipe’s creator. You cannot add too much garlic. Period.
- Not enough olive oil. As a result–not enough shrimp shell oil to flavor the pasta.
- Not enough lemon zest/juice. To be fair, I was already about to be late for a meeting and said, “screw it, good enough.” Squeezing lemon on leftovers later, I realize that it did make a difference.
One other big learning I had was: NEVER get shrimp you have to peel and devein yourself if you don’t have to. Something that I thought would take me 10 minutes to do ended up taking me closer to 30 minutes was this task. It’s tedious, kinda gross, it flares up my eczema, and I regretted everything about 15 minutes in. Just save your time and get EZpeel shrimp. You still get your shells in the end. Doing it yourself is not worth it.
Not my best work but I learned some stuff at least. Good riddance, shrimp shrimp.
Pear Arugula Salad w/ Balsamic Soy Dressing
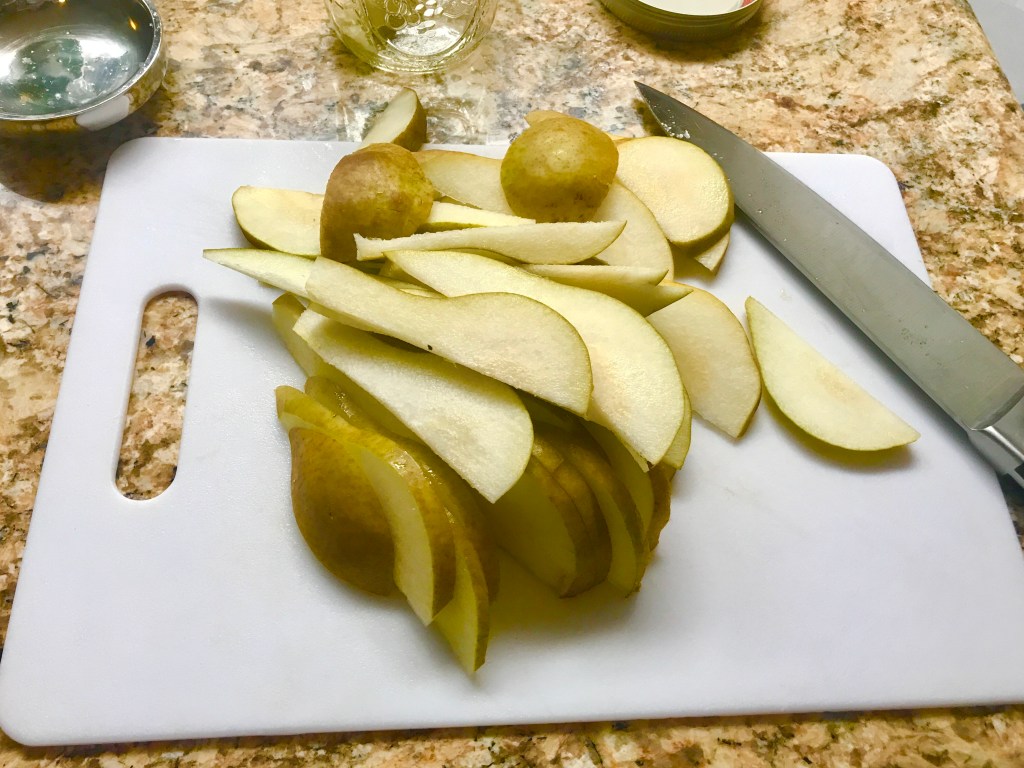
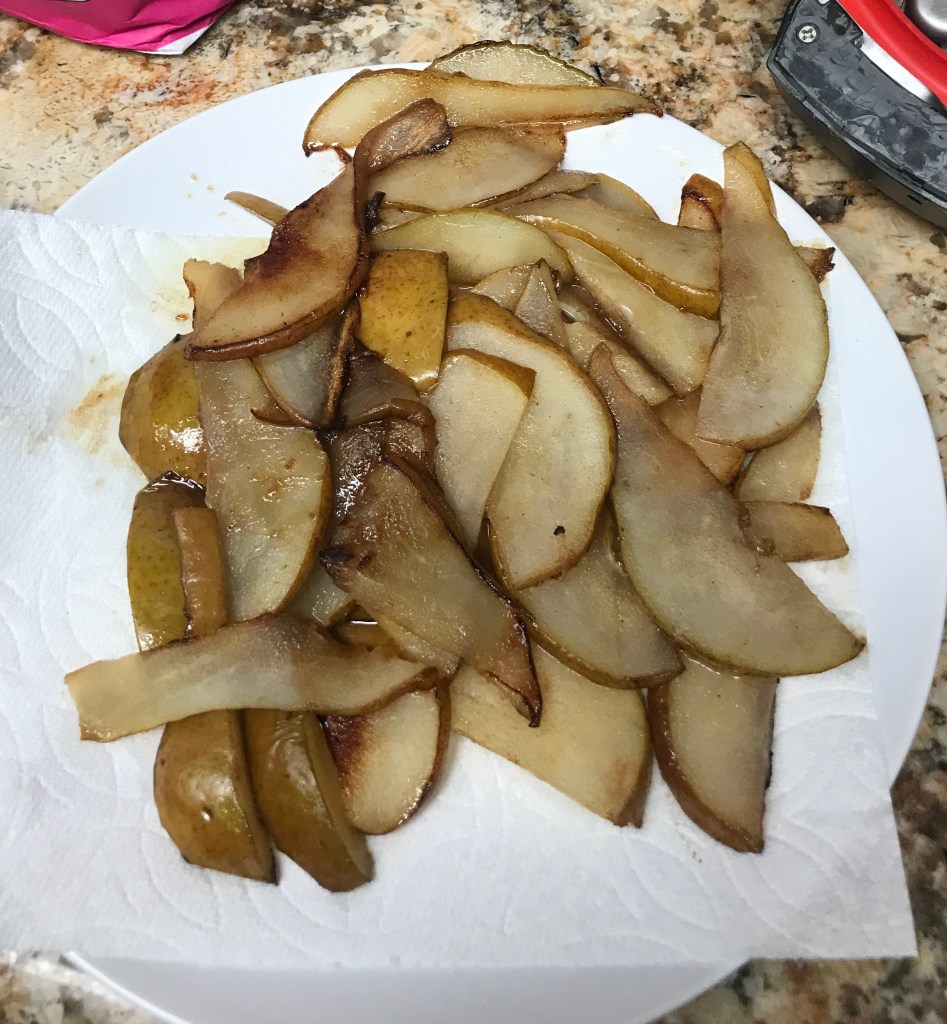
This recipe was much more straightforward, considering it is a salad. The only “cooking” involved were the pears. I sliced up the pears and tossed them in a bit of sugar before cooking them on the stove. It took longer than a minute to brown on both sides but they definitely tasted sweeter after I was done with it. In hindsight, I even think this salad would be fine with using raw pears. I like the crunch of raw pears.
Because I do like balsamic vinegar, I was already pre-disposed to like the dressing. One thing that I had to do that I never did before was mincing shallots/garlic, probably because you don’t want chunks of garlic and shallots in your dressing. This was the first time I used a micro-grater on something that wasn’t a lemon. After combining the ingredients altogether, the dressing was pretty tangy, salty, with the flavor of the shallots coming out at the end. Unsurprisingly, I liked it.
I also toasted some walnuts (350F for 10 min, it’s sooo good and this is by far one of my favorite tips) to add to the salad. After combining the pears, walnuts, cheese, and the arugula (with some spinach), I added maybe about 1/4 of the dressing to start off conservatively and lightly dress the salad. It turned out pretty dang good.
Walnuts + cheese + core fruit + greens + balsamic-based dressing = Happy salad for me.

Bonus: Fruit Tart
So I made another tart, this time a fruit one with lots of berries. I know people are into that. Like before, in order to bake anything these days, I have to schedule when to make things. Claire’s video was also very helpful again when making this, though I did include a few minor tweaks.
Monday: Make tart dough. If making it at 11PM, drape at least 2 towels to muffle the noise of the food processor before one of your housemates yells at you.
Tuesday: Bake tart shell, make pastry cream, cut fruit, put pastry cream into tart shell and chill overnight
Wednesday: Assemble fruit tart and chill and bring to team meeting
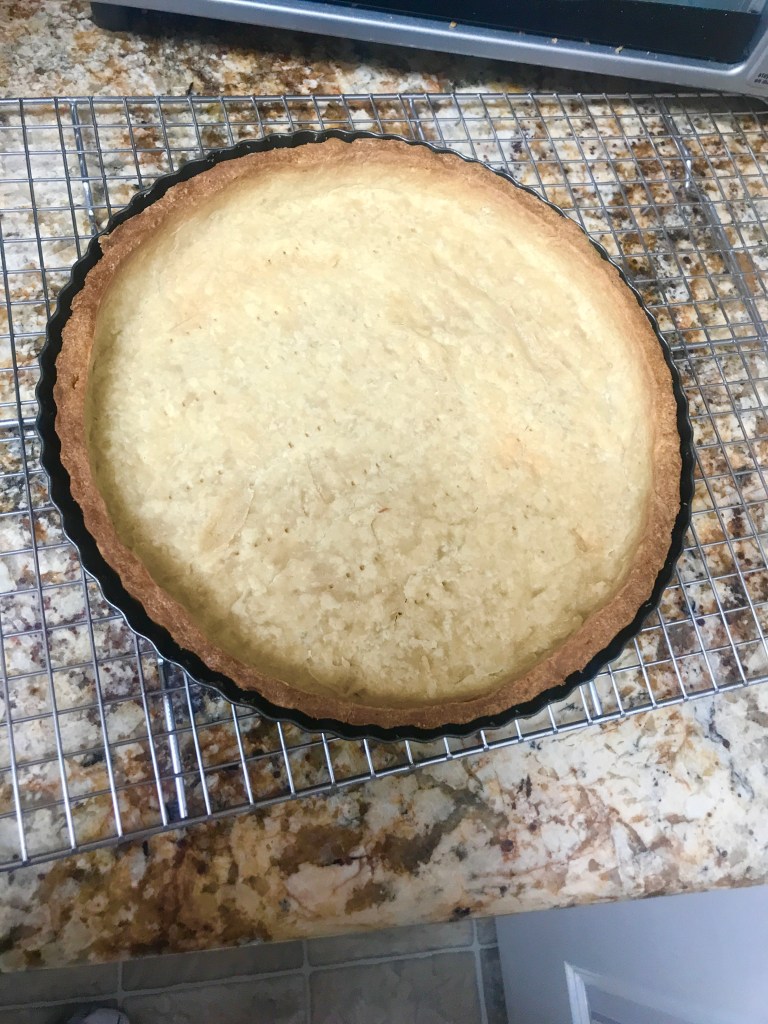
Making the crust was very straightforward, I’m glad at how non-fussy it is to make the dough and to shape it into the pan. I also realize that chilling the dough will always take closer to overnight chilling, rather than the 30-min chill that Claire used. Perhaps, it’s my fridge but it really does that long for the dough to become firm enough that I can knock it. Because I wasn’t going to bake the fruit tart, I fully baked the shell for closer to 50 minutes, the edges were a little brown for my taste but I wanted to make sure the inside was fully baked. I had to use the pie shield again to shield it from over-browning.
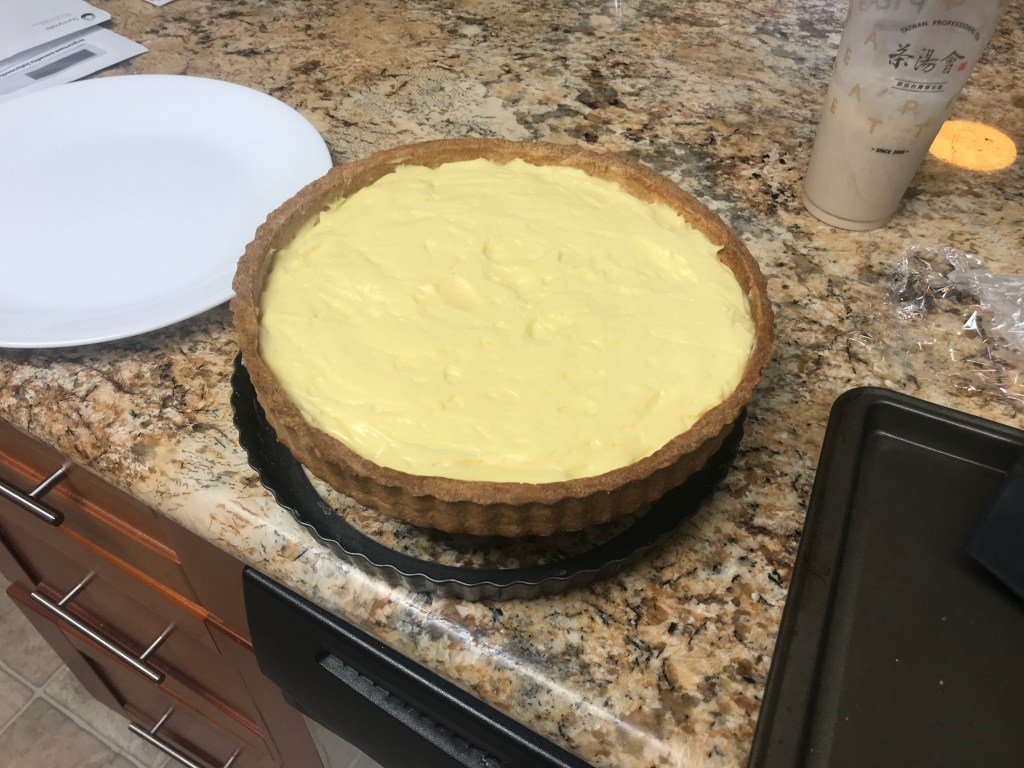
I think I’m getting really good at separating egg yolks and whites and making puddings/custards/everything in between at this point, given my past history. This time, because I wanted the pastry cream to be stiff enough to cut into and I wasn’t baking it like the lemon curd, I purposely cooked it a for a minute longer to cook the egg yolks a little more. When I poured the pastry cream into the shell and smoothed it over with a spatula, it sounded like someone wetly slapping you [“Something about this noise sounds wrong.” – unnamed housemate]

The finished product, after being topped with the berries and glazed with apricot jam, looked like so:
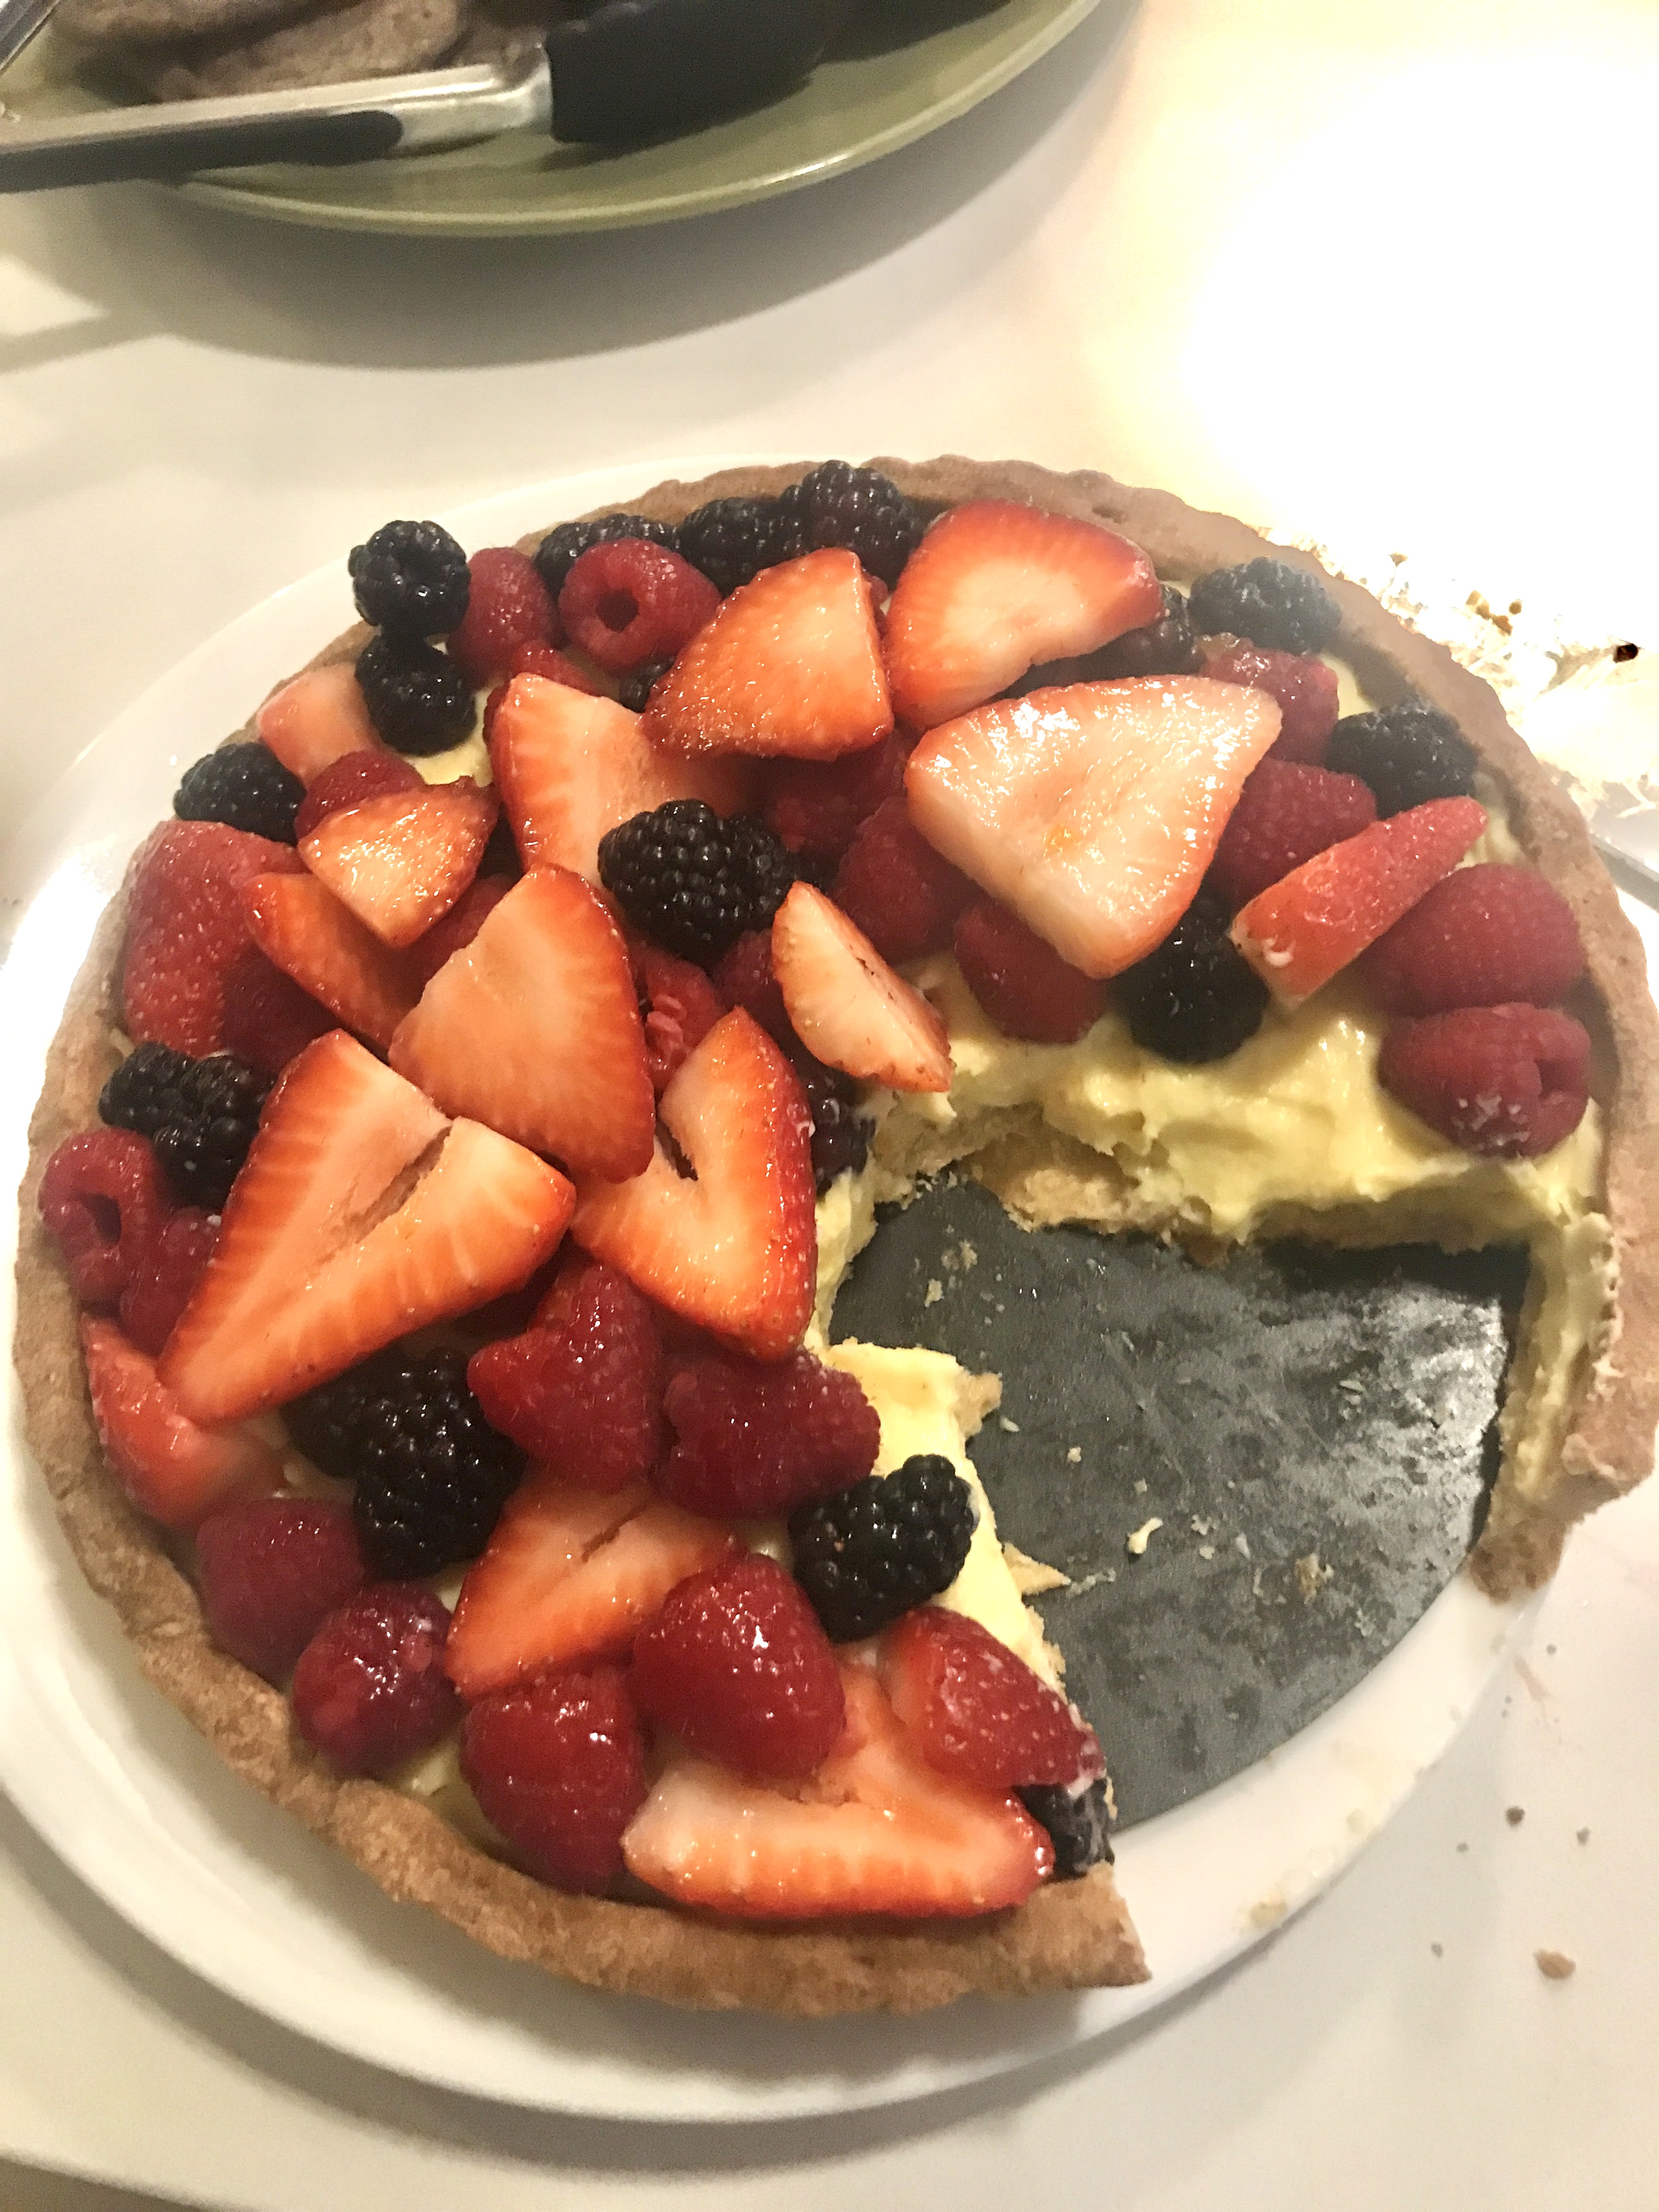

I was really happy with how the fruit tart turned out. The chilling period for the pastry cream in the tart shell proved to be a very wise choice, because the cream had enough time to hydrate the bottom of the shell so it wasn’t super hard to cut through the crust with a knife. The pastry cream was also surprisingly lightly sweet and bolstered the flavors of the berries, which I was also happy with. This was also the first time I ate raspberries and liked it. I hate raspberries. So, this leads me to two final conclusions:
- This fruit tart revolutionized my perspective on raspberries.
- I just had a really good batch of raspberries after a long history of having really bad ones.
Who knows?

Leave a comment