This is a late post (I got sick this past weekend, still recovering as of now) but last week, I decided to try my hand at making cream puffs with vanilla pastry cream. The recipes for the choux pastry and the pastry cream were taken from Claire Saffitz’s Dessert Person. Claire’s videos, part 1 and part 2, were also helpful references as well.
Overall, this was a fun and educational run and I can see myself doing different variations of this dessert.
Though I called them “cream puffs”, another name for what I made today was “profiteroles.” What’s the difference between a cream puff and a profiterole? Nothing. Profiterole is just a fancy word for cream puff. The name popped up as many of the recipes for cream puffs that I came across, involved slicing the choux pastry in half and filling it with whipped cream, which is something that I did not want to do. Profiteroles looked more like the idea of the cream puff that I was looking for: filling the choux pastry with pastry cream or at least a non-whipped cream filling. No idea why they’re regarded differently because the meaning of both is the same.
Pastry Cream
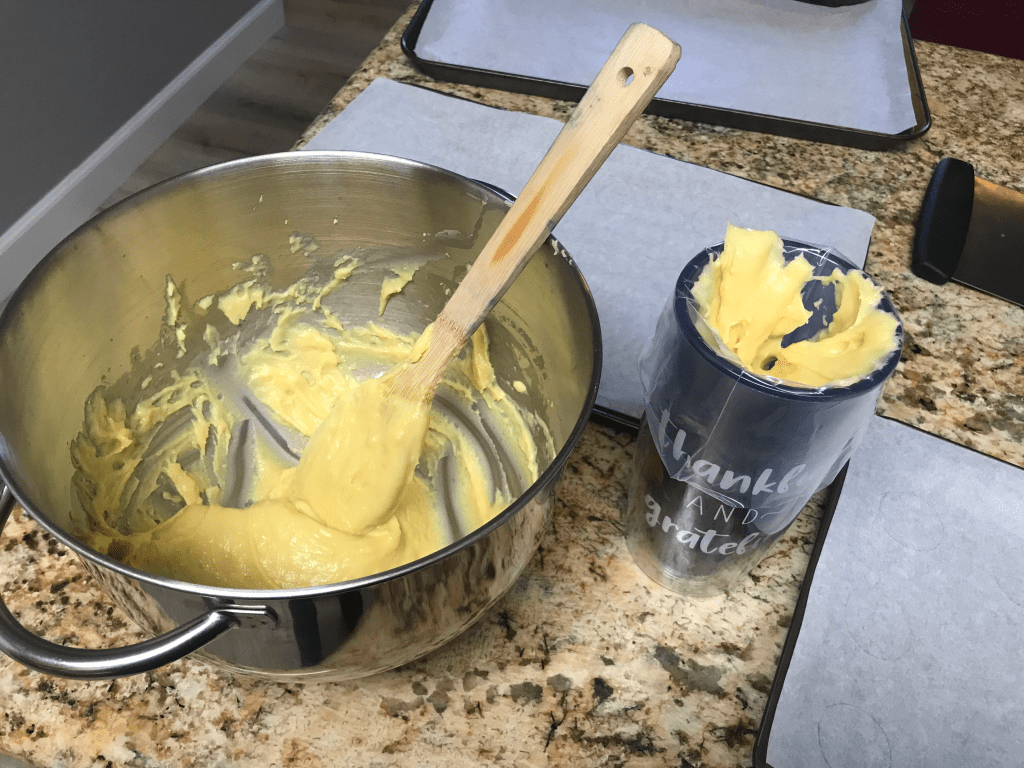
I used the same pastry cream from the fruit tart, this time, cooking a little less out of fear of overcooking it. Though, in hindsight, I think I could have cooked it for a little longer to maintain its shape more when cut/bitten into but I was still pretty satisfied with this. Again, I like the fact that this pastry cream is not overly strong in vanilla flavor and there is more emphasis on the creamy flavor from the milk/heavy cream. I didn’t notice much of a difference when using a combination of heavy cream/milk, versus just milk.
Choux Pastry
The fancy French word for choux pastry is pâte à choux, which, I learn, is pronounced as “pat-a-shoe” or “pay-ta-shoe.” This dough is simple and unique in that it only requires 7 ingredients (water, milk, sugar, salt, butter, flour, eggs) and it is initially cooked on a stovetop. Instead of using a rising agent like baking powder/soda, it used steam from moisture to create the “puffing effect.” The ideal cream puff would be hollow.
So, the first time I tried to make this, I was not successful. The cream puffs were flat and very small. They were not hollow. This is where I learned that the number of eggs matter. I added too many eggs the first time (6 instead of 5). The batter doesn’t have to be super liquidy and can be sort of stiff/lumpy. I also suspected that I didn’t cook the dough long enough on the stove to evaporate all the moisture.
The second time, I tried to cook the dough a little longer (closer to 5 min) and exactly added ~300g of eggs (5 eggs) and used a stand mixer this time. It is possible to do it by hand but fair warning, it is an arm workout and takes a lot longer. As I added each egg, I looked for the tell tale sign of lifting the paddle attachment and seeing if the mixture was thick enough to make a V-shaped trail. It was not very liquidy, and more on the lumpier side that it dropped in globs, rather than a liquid.
I loaded up a pastry bag and made it a point not to overfill the bag. I think the sweet spot is to fill the bag to only a little over half and to refill as I go. I followed Claire’s guidance to draw circles on the parchment paper as a guide when I started piping. I found that using a Trader Joe’s Extra Virgin Olive Oil bottle cap or any cap that is 1-1/2″, rather than 1″ was a good shape. Some other tips:
- Try to trim the parchment paper down to the size of the baking sheet. It saves the headache of parchment paper crinkling in weird corners on the baking sheet and staying flat.
- Use a bit of dough to glue the sheet corners down on the sheet for a flat surface
- You don’t have to draw every circle on the parchment paper. You can draw like so:

I followed Claire’s technique of keeping the piping bag in place at a 45-degree angle and piping the dough until the circle was filled, then snapping up to make a small point.
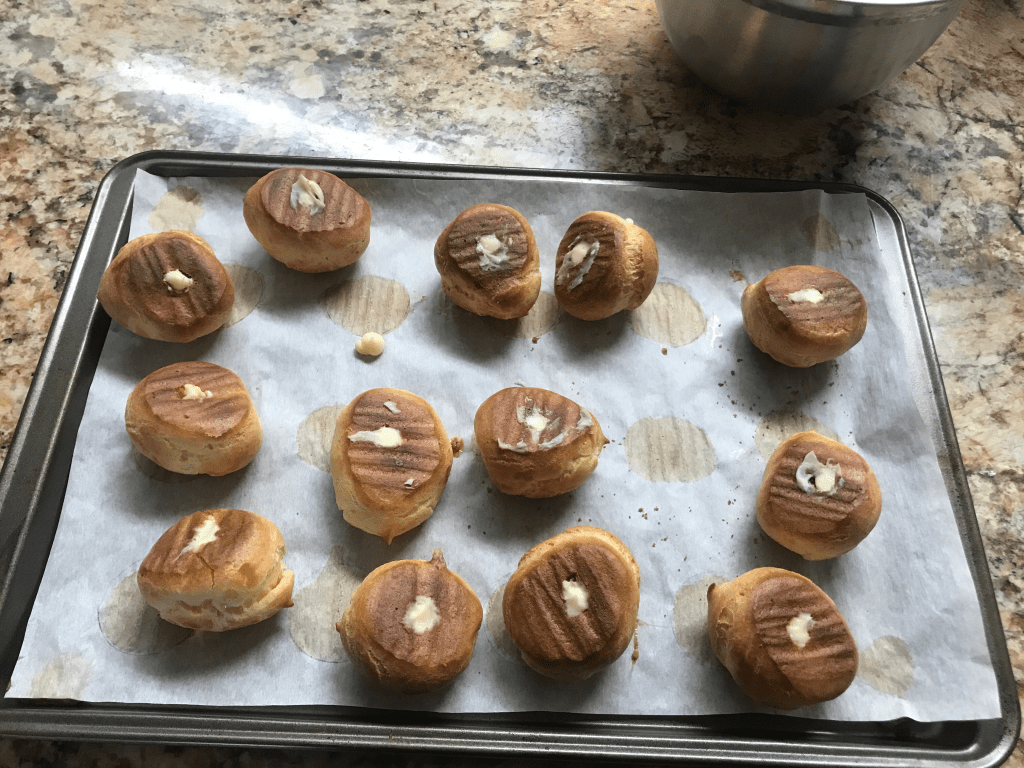
I then brushed the piped circles with egg and tried to be generous with it. Though there were instructions on how to bake 2 batches at once, I knew that the bottom rack burned a lot more quickly and thus decided to play it cautious and cook one batch on the center rack at a time. I baked it at 425F for 5 min, then lowered the temp to 375 for an additional 20 min. They puffed up in the oven. I then cracked the door open and waited 5-10 min before I started reaching for each one individually and using a small paring knife to poke a hole on the bottom. I found that I did not have to wait the full 15 minutes to let them cool.
I then started piping the pastry cream in the cream puffs. Luckily, the hole was big enough for the piping tip to fit. I also found that these choux balls can hold A LOT of pastry cream. In the end, the amount of pastry cream that I made was enough to fill 20 1-1/2″ cream puffs.
I had to fill the rest with canned whipped cream since I was out of time and I noticed that the canned whipped cream had no structure whatsoever so the last 8-10 cream puffs with that had no substance :,)
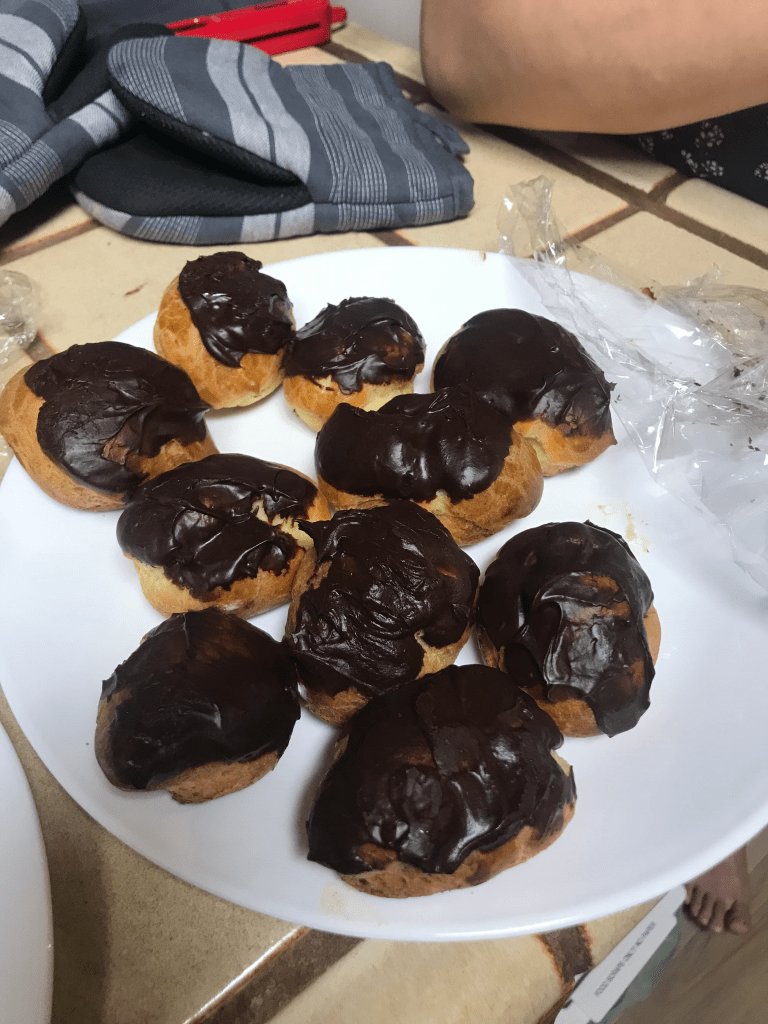
To add a little extra, I made a quick chocolate ganache. It was surprisingly very easy and hopefully something that I can refer back often. Using this as a reference, I quickly heated up 1/2 cup of heavy cream in the microwave (30-45s) and poured it over 4 oz of semisweet chocolate chips, then let it stand for 10 min. After a quick stirring until it became a sauce (who knew it was this simple???), I dipped the cream puffs in the chocolate and let it cool and harden. The fridge hastened the process. Ironically, for one of the kids, the chocolate was her favorite part. I saw her ignoring the cream puff entirely and meticulously licking off the chocolate on the top instead. Priorities of some kids, I guess.

Overall, it was really fun making this and my goal the next time I make this would be to try a different pastry cream flavor and maybe make one that looks like this?

Leave a comment