The last and final item of my holiday gift box was Portuguese egg tarts a.k.a. pasteis de nata a.k.a po tat. I was initially inspired to make classic egg tarts, thinking of my very HK-proud friend and the things she liked. However, I eventually decided to add an extra degree of “oomph” by making the Portuguese version. The recipe for these tarts can be found in Kristina Cho’s book, Mooncakes and Milk Bread, but I also found a variation of the classic egg tart, which is very similar, found here. Emmymade’s video also provided a helpful reference when I was making the puff pastry crust.
The Difference between Dan Tat vs Po Tat
Whenever you walk in a Chinese bakery, there’s a good chance you’ll see two types of egg tarts–one with the glassy yellow surface (the classic egg tarts) and one with the brown spots on the yellow surface (the Portuguese egg tarts). I actually never ate the second type and always gravitated towards choosing the classic egg tarts. I ended up consulting these two pages from The Woks of Life as well as this post for some references.
So, the first difference is obviously where each egg tart came from. The classic egg tart is from Hong Kong while the Portuguese egg tart was originally brought over from Portugal to Macau, which I learned recently isn’t part of Hong Kong.
For the classic egg tart (also known as dan tat), Hong Kong took their inspiration for this treat from the British version of these tarts. This tart consists of a sweet filling made from evaporated milk, eggs, vanilla, and sugar with a tart shell typically made from shortbread pastry, though some could be made with puff pastry instead. This fact surprised me and made me realize that I probably had made egg tarts the wrong way in the past when I used pie crust as my tart shell.
Hmm. Might be worth revisiting them. Also reminds me of a certain egg-tart loving peer, with whom I promised to make egg tarts but never did (this is also the same peer who tells me my blog is “too much”. Well, excuse u, I have a LOT of THOUGHTS to SHARE, okay?? >:[ Let’s see if she even catches this.)
On the other hand, the Portuguese egg tart, known as pastel de nata (a.k.a “cream pastries”) or po tat in Cantonese, was first introduced in Macau by a British pharmacist, Andrew Stow, who loved them so much that he opened up his own bakery for them. The original pastry dates back much earlier to the 1600-1700s, first created by Portuguese monks in Belém in Lisbon. One other cool fun fact about it is that another name for this pastry, one even more specific to where it originated from, is Pastel de Belém, or “Pastries of Bethlehem”, a reference to the origin of this pastry. Unlike the dan tat, this egg tart consists of a sweet filling made form egg yolks, flour, milk, sugar, vanilla, and cinnamon with a tart shell typically made from puff pastry.
Making Chinese Puff Pastry Tart Shells
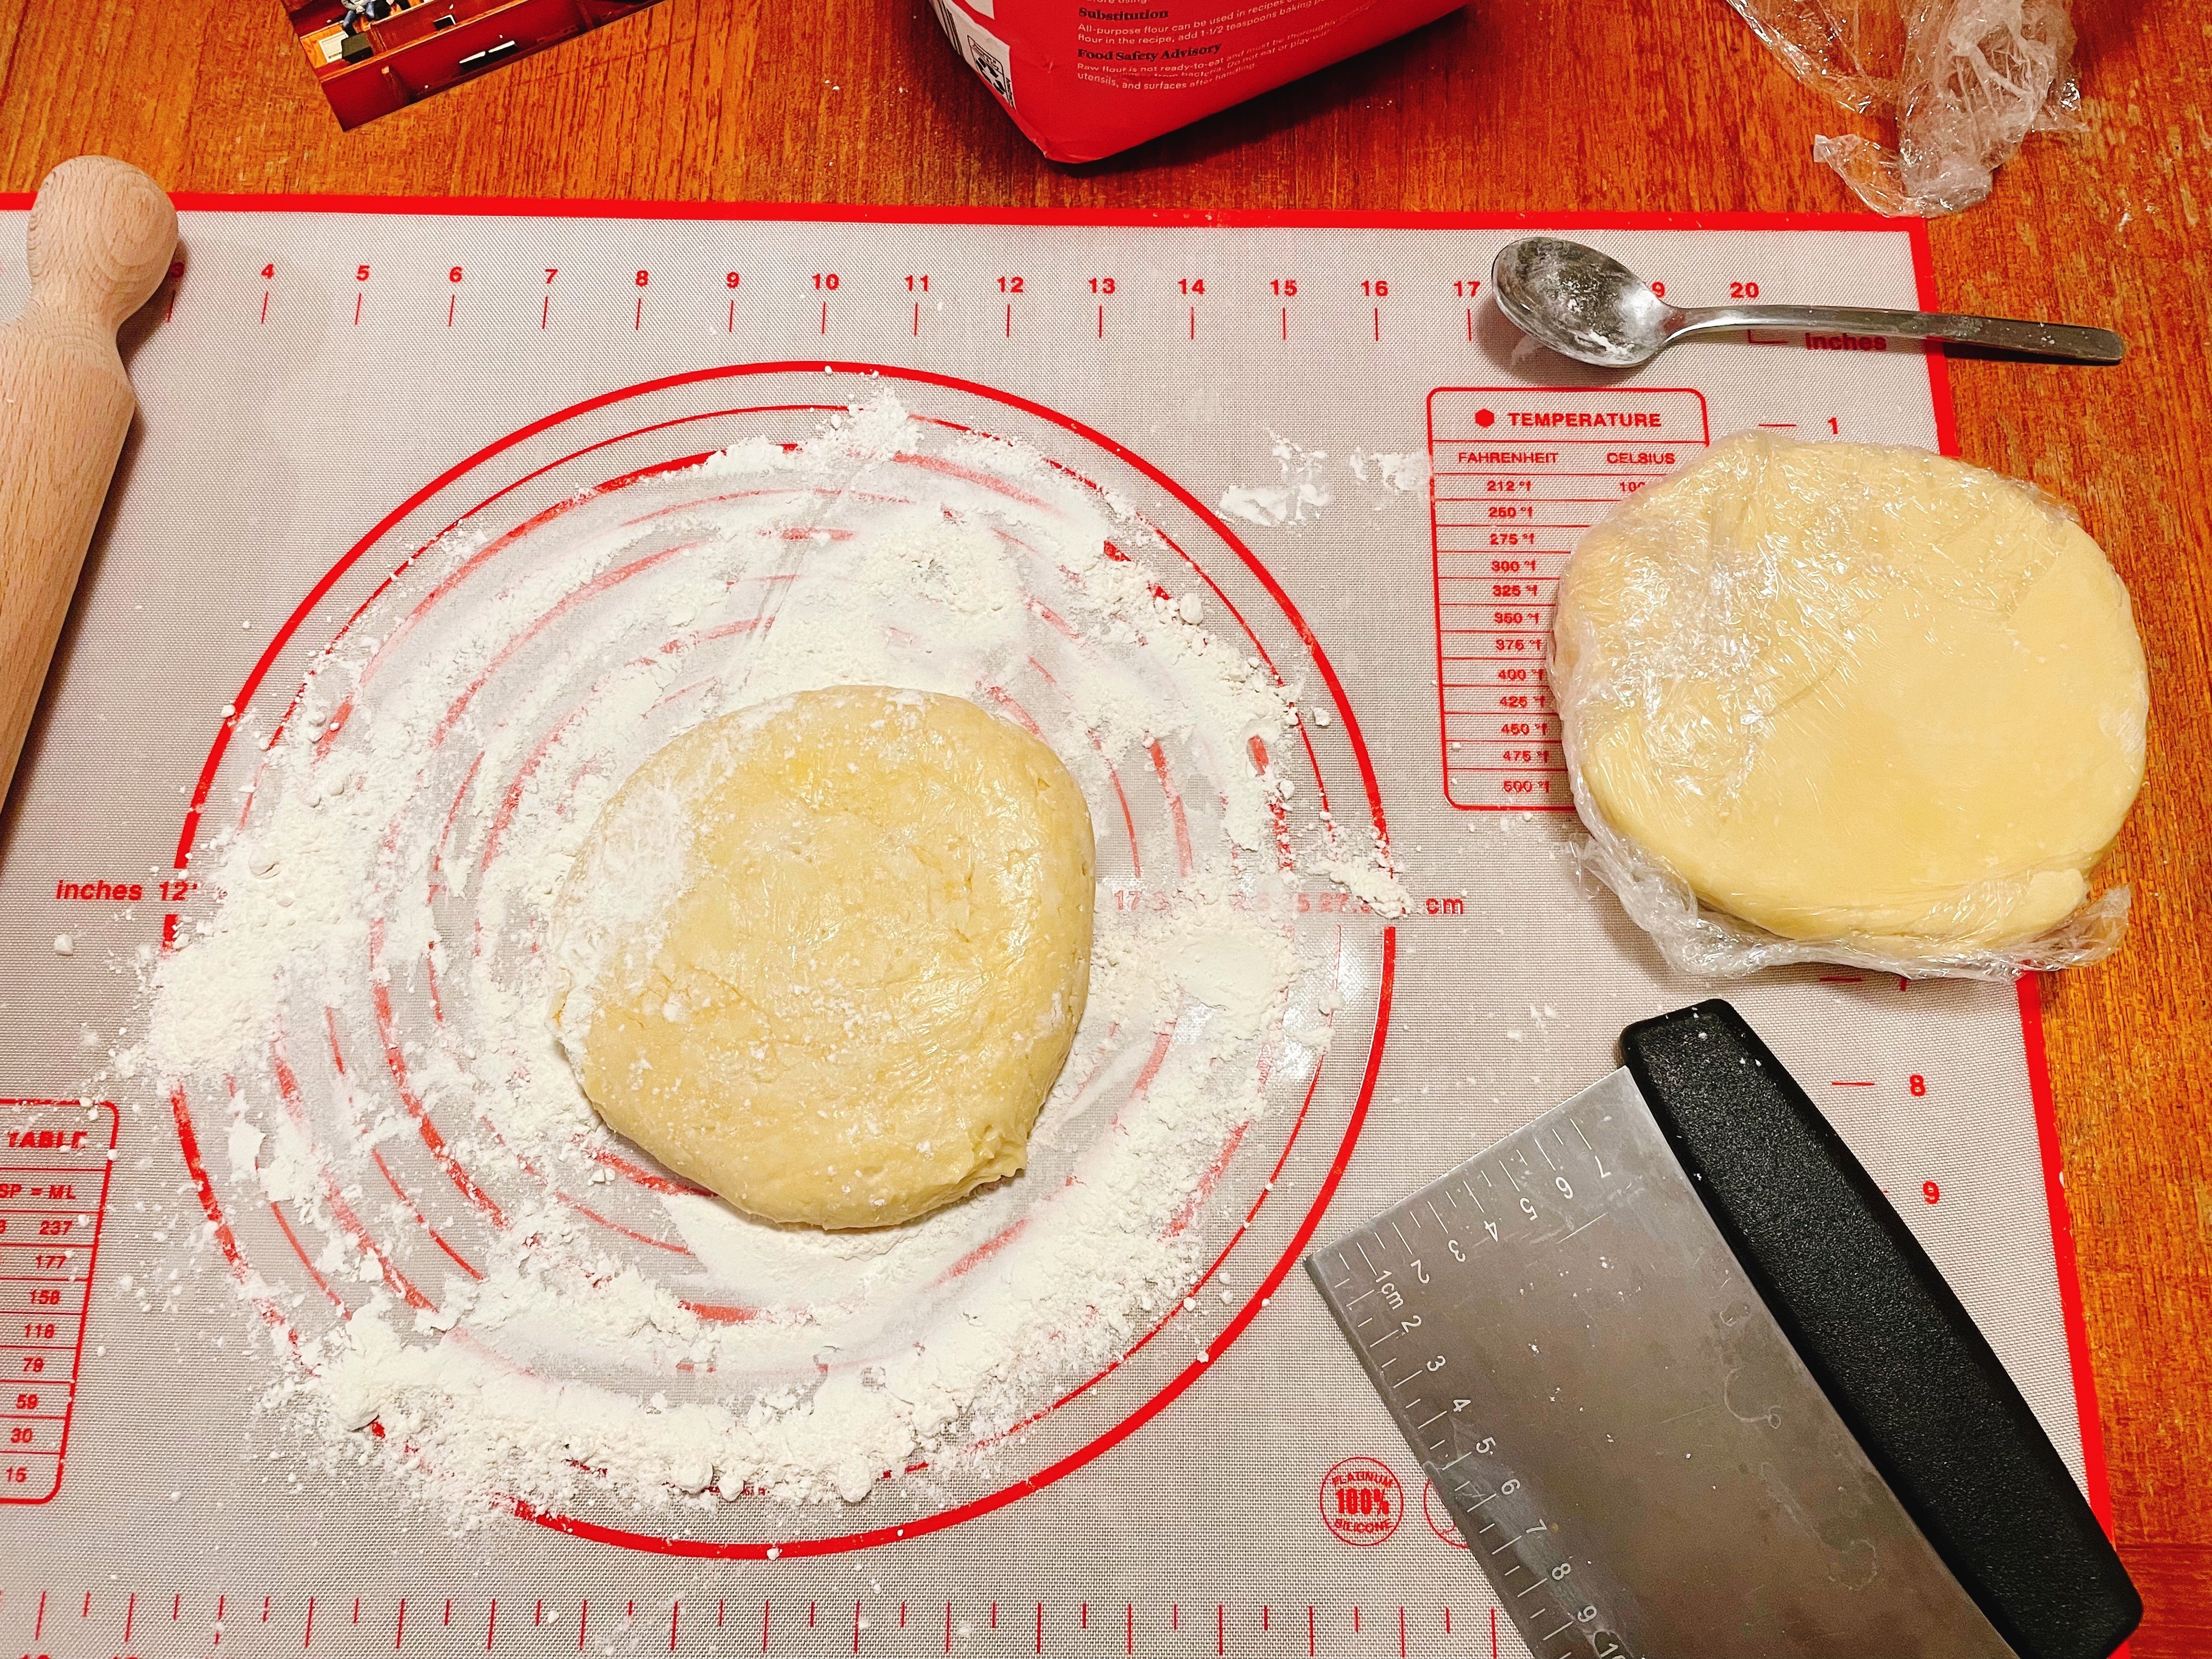
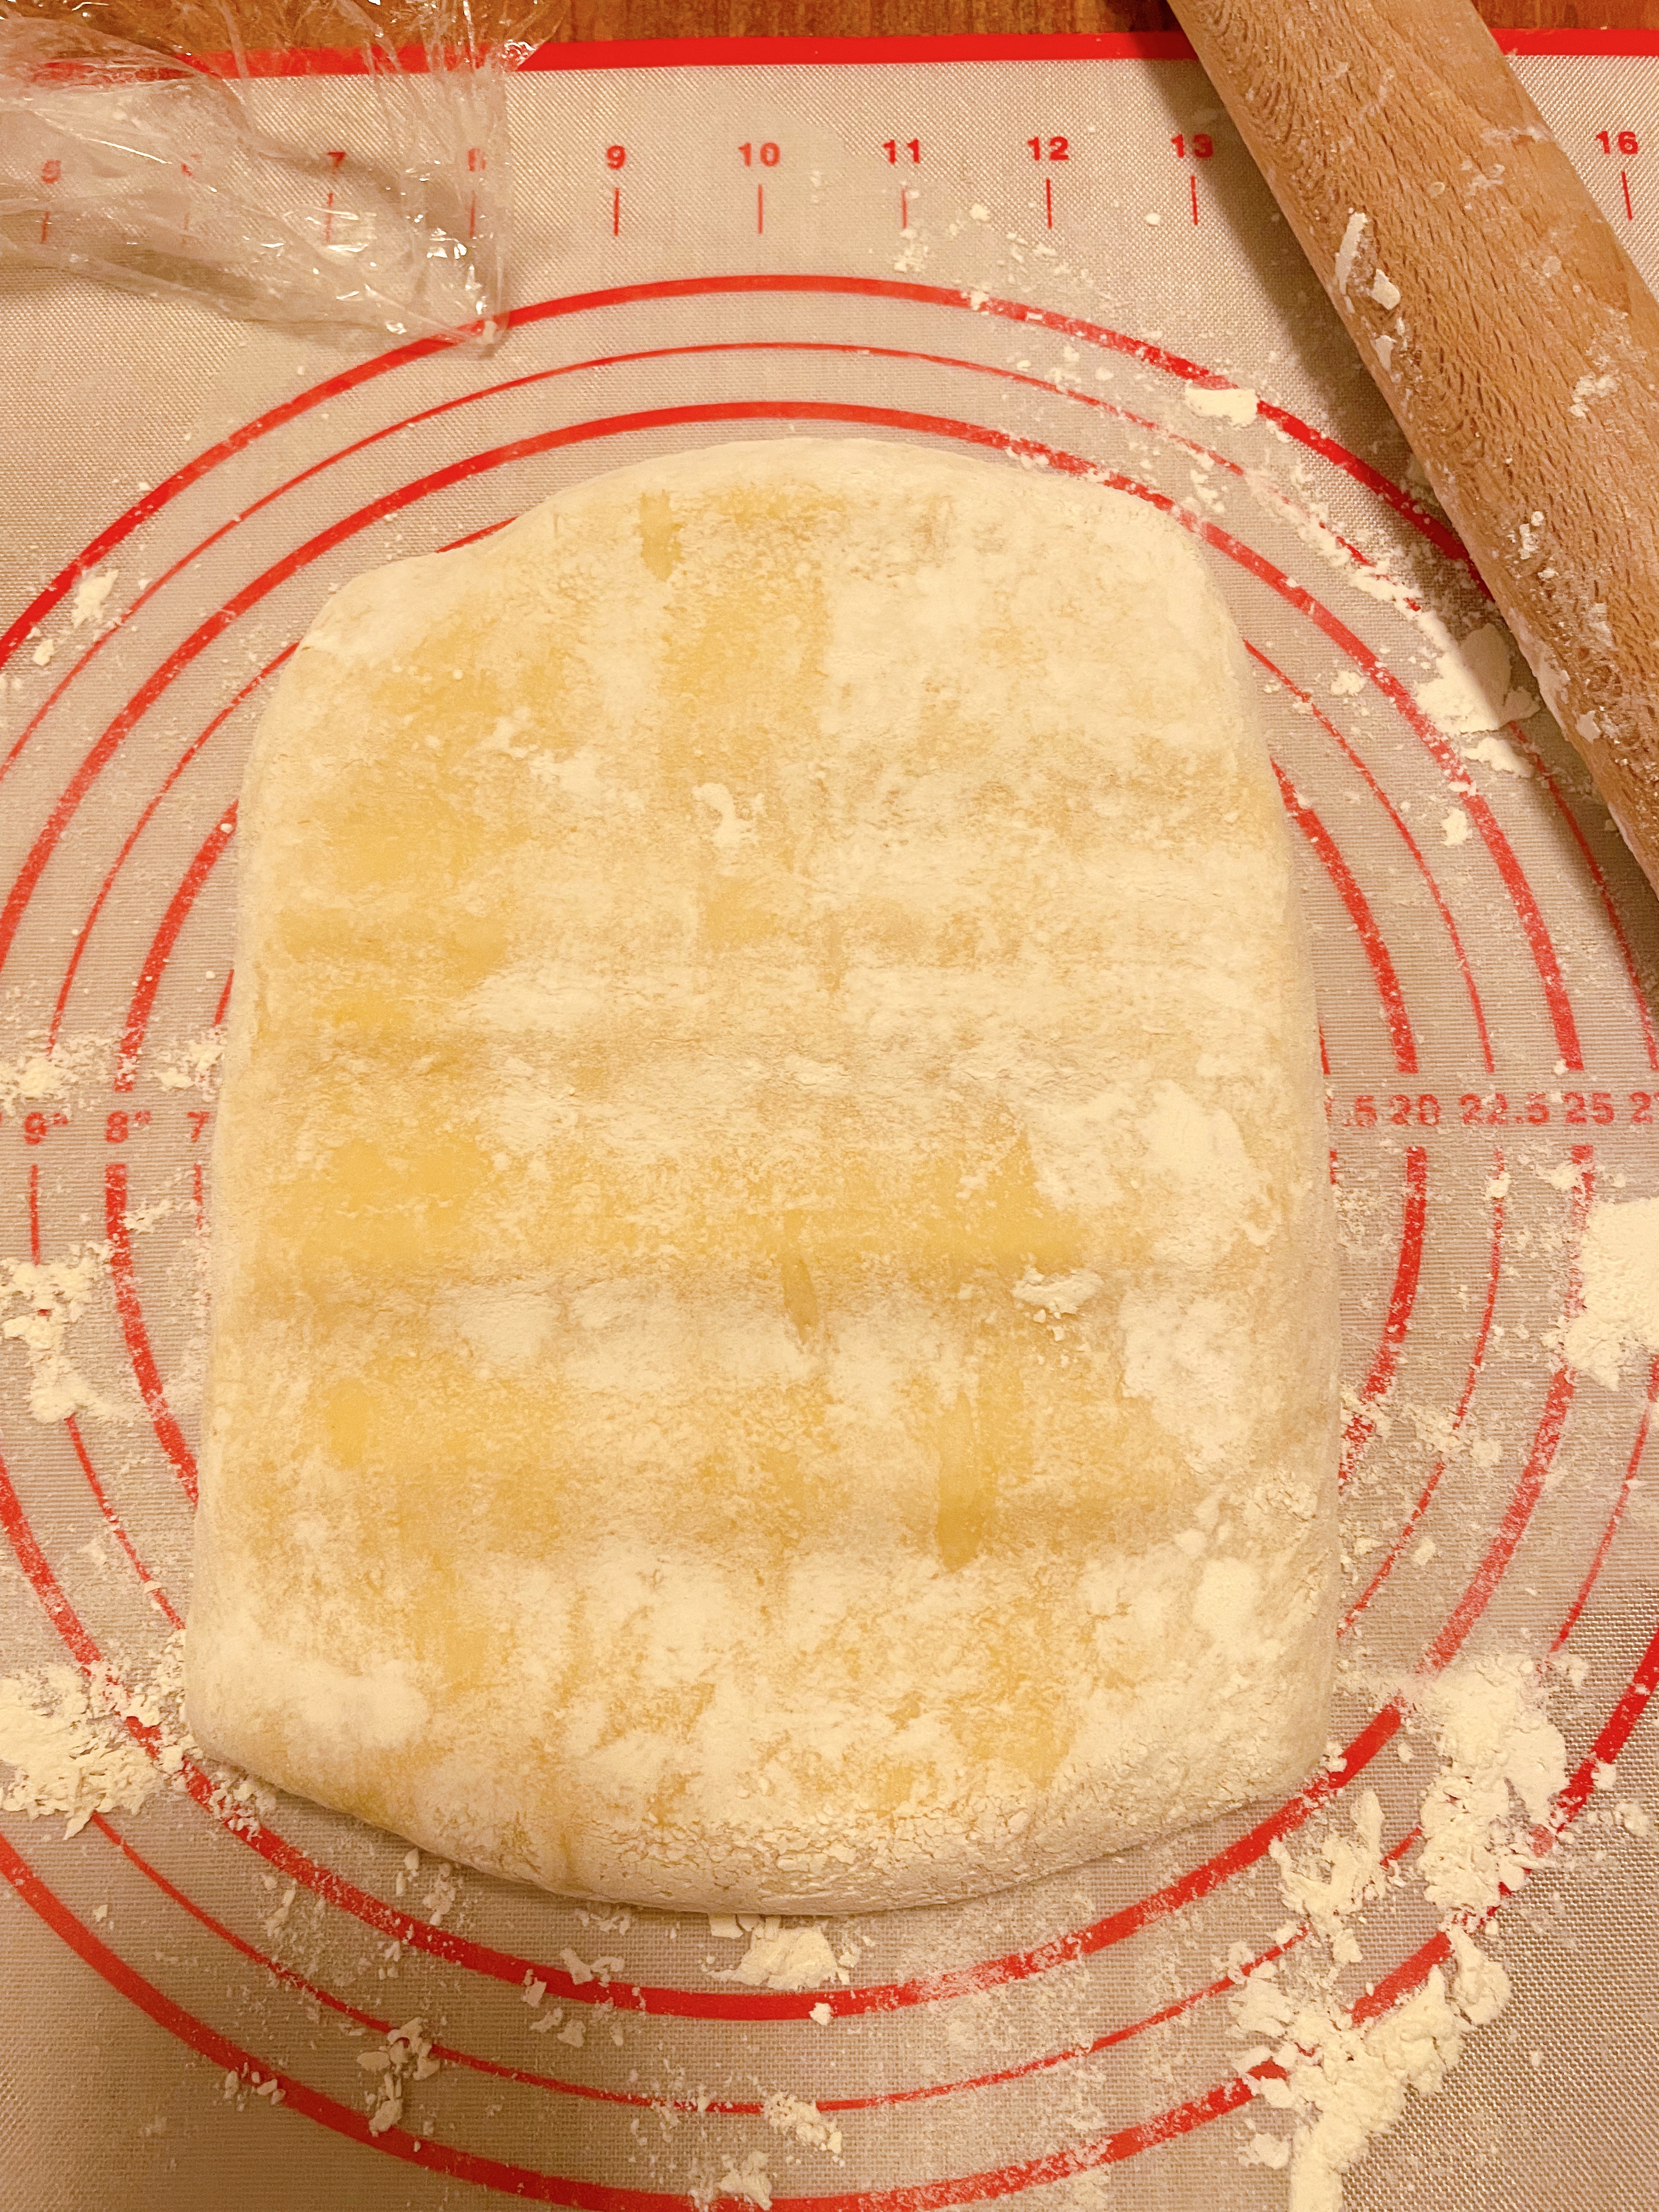
I decided to spread out the making of these tarts over a three day process (Tues – Thurs), first starting with my base or Chinese puff pastry. On Tues, first, I made my flour and butter blocks for the Chinese puff pastry. Initially, my butter block was very crumbly and dry after pulsing the flour and butter in a food processor. Because her book mentioned that the mixture would be a crumbly, I still proceeded. However, after noticing that it didn’t become a cohesive block of butter after letting the pile of butter crumbs wrapped in saran wrap rest in the fridge for about 45 minutes, I turned to the Internet and found Emmymade’s video, which ended up being a very helpful reference through each step on what the puff pastry should look like. After getting a better idea of what the butter block should look like, I put the mixture back in the processor and pulsed it until it formed a ball around the processor, which I then re-Saran wrapped into a ~5″ x 5″ square and chilled in the fridge.
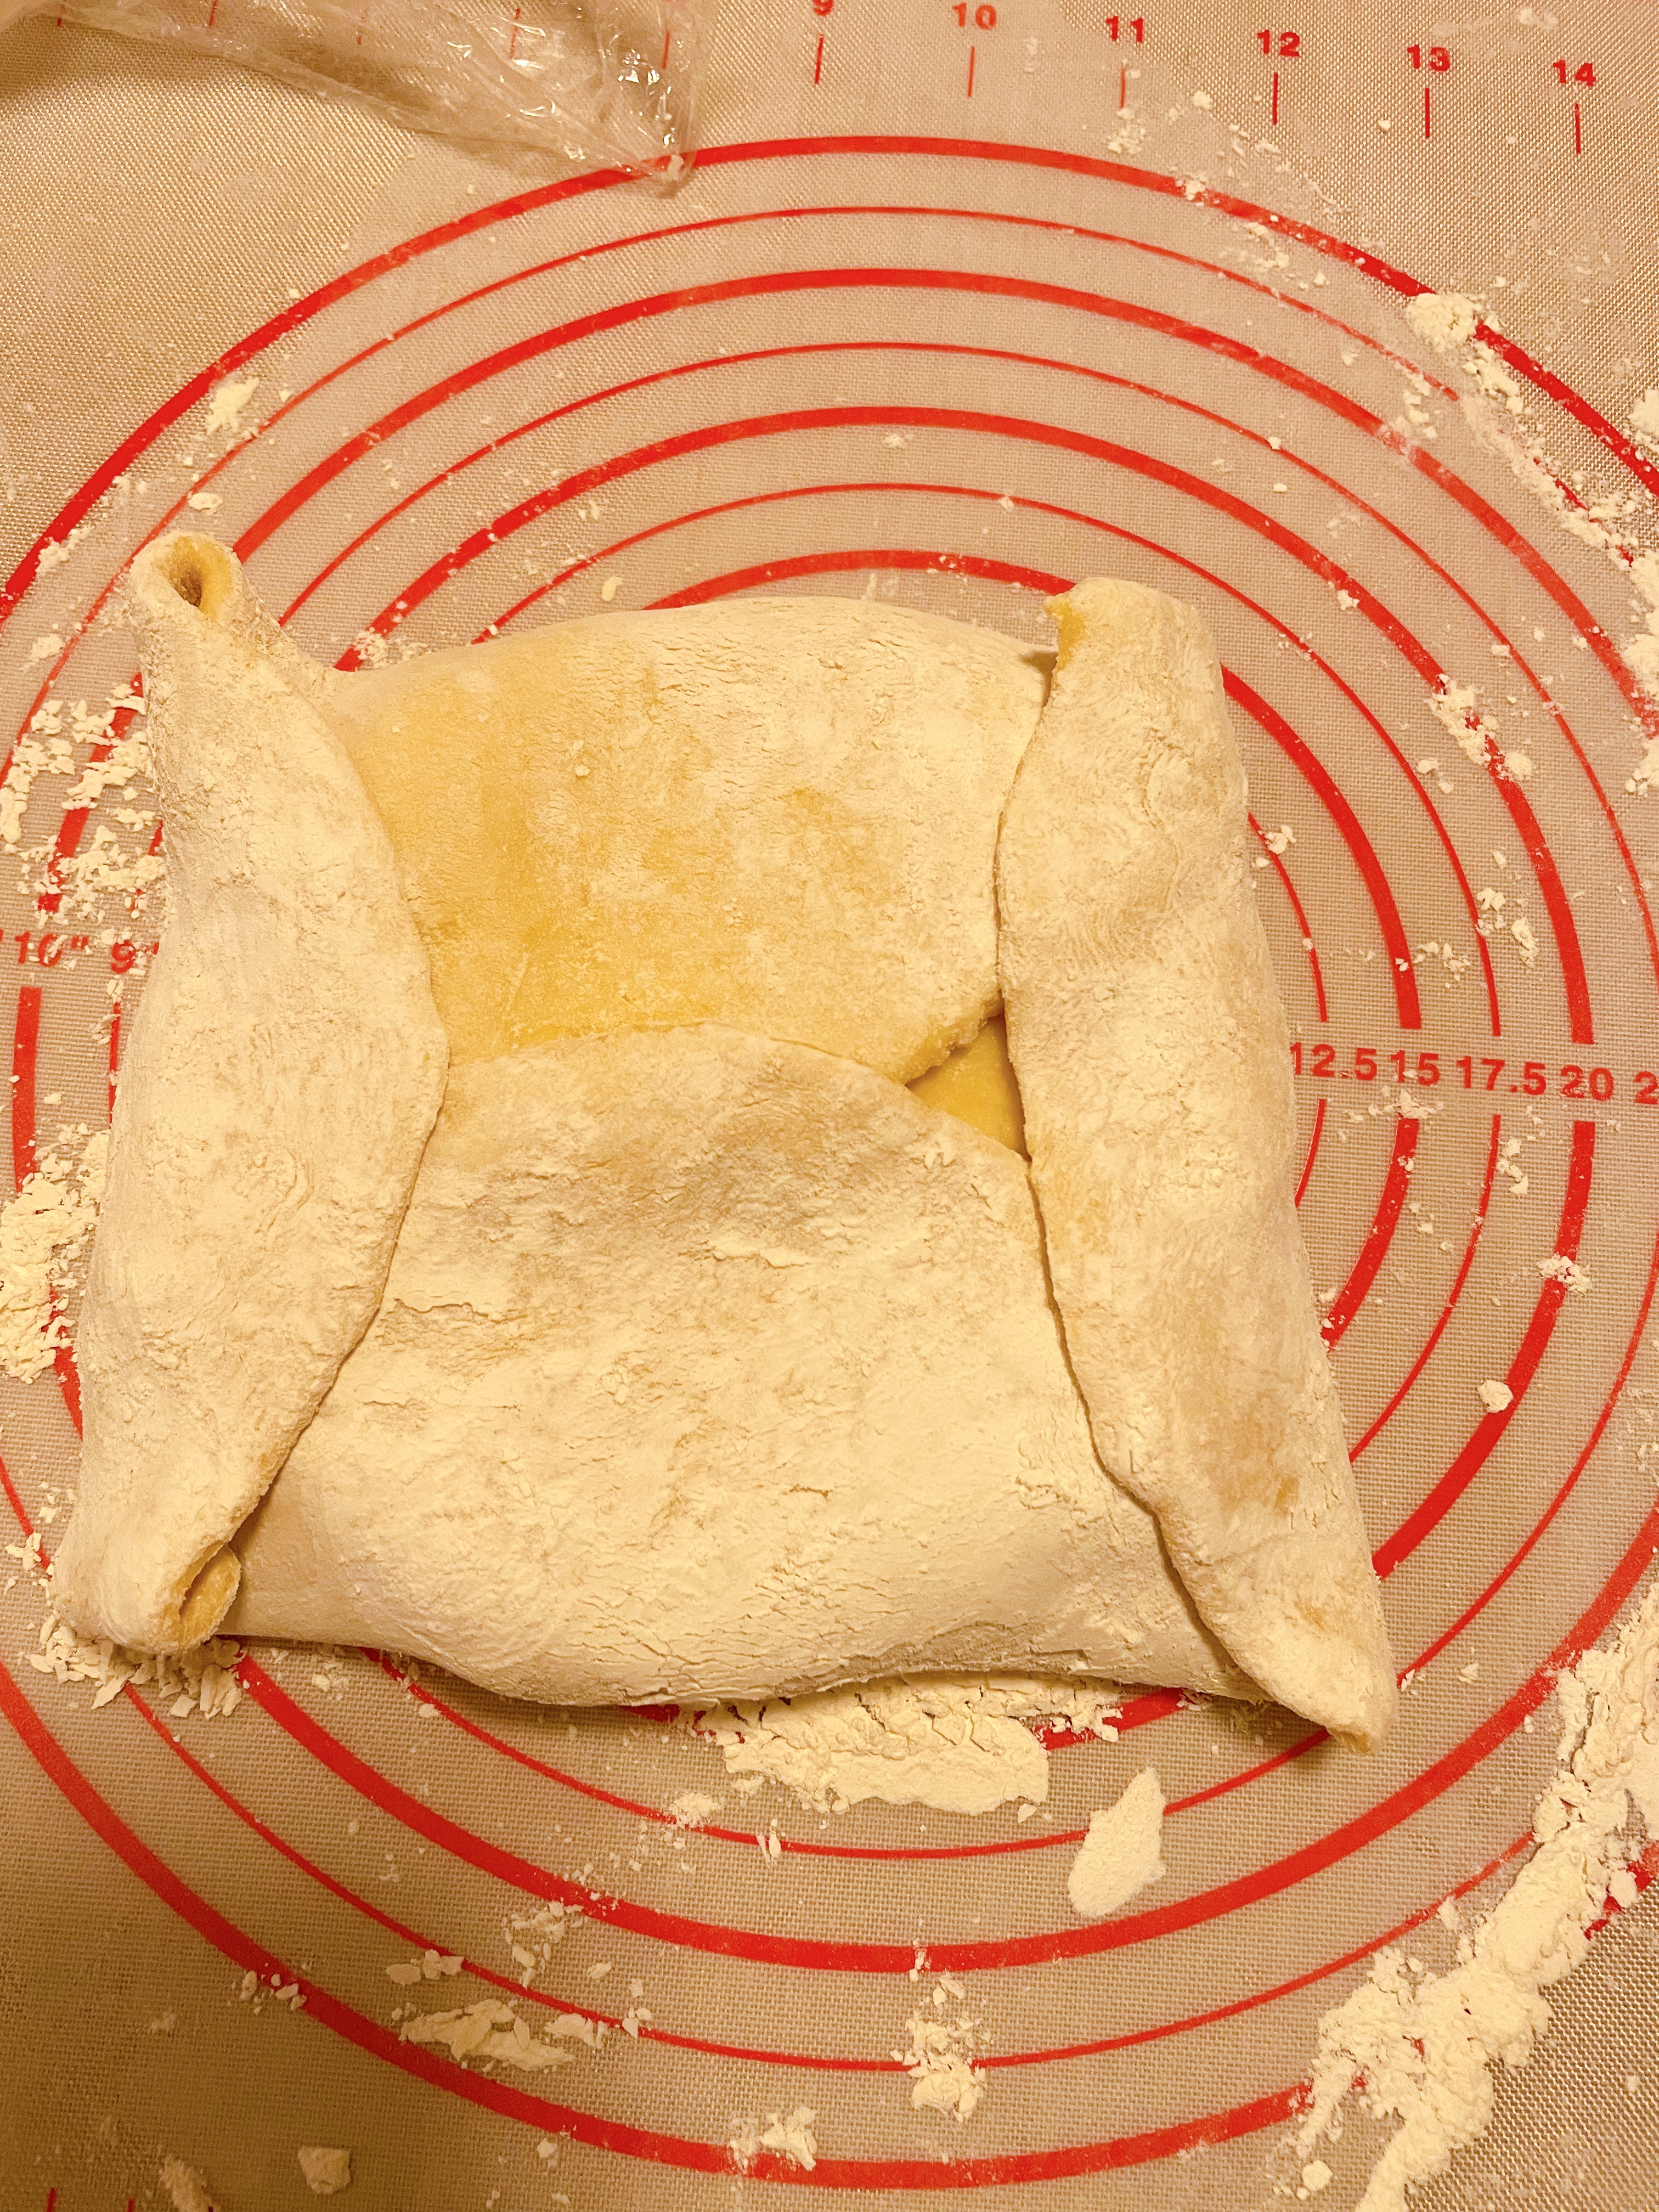
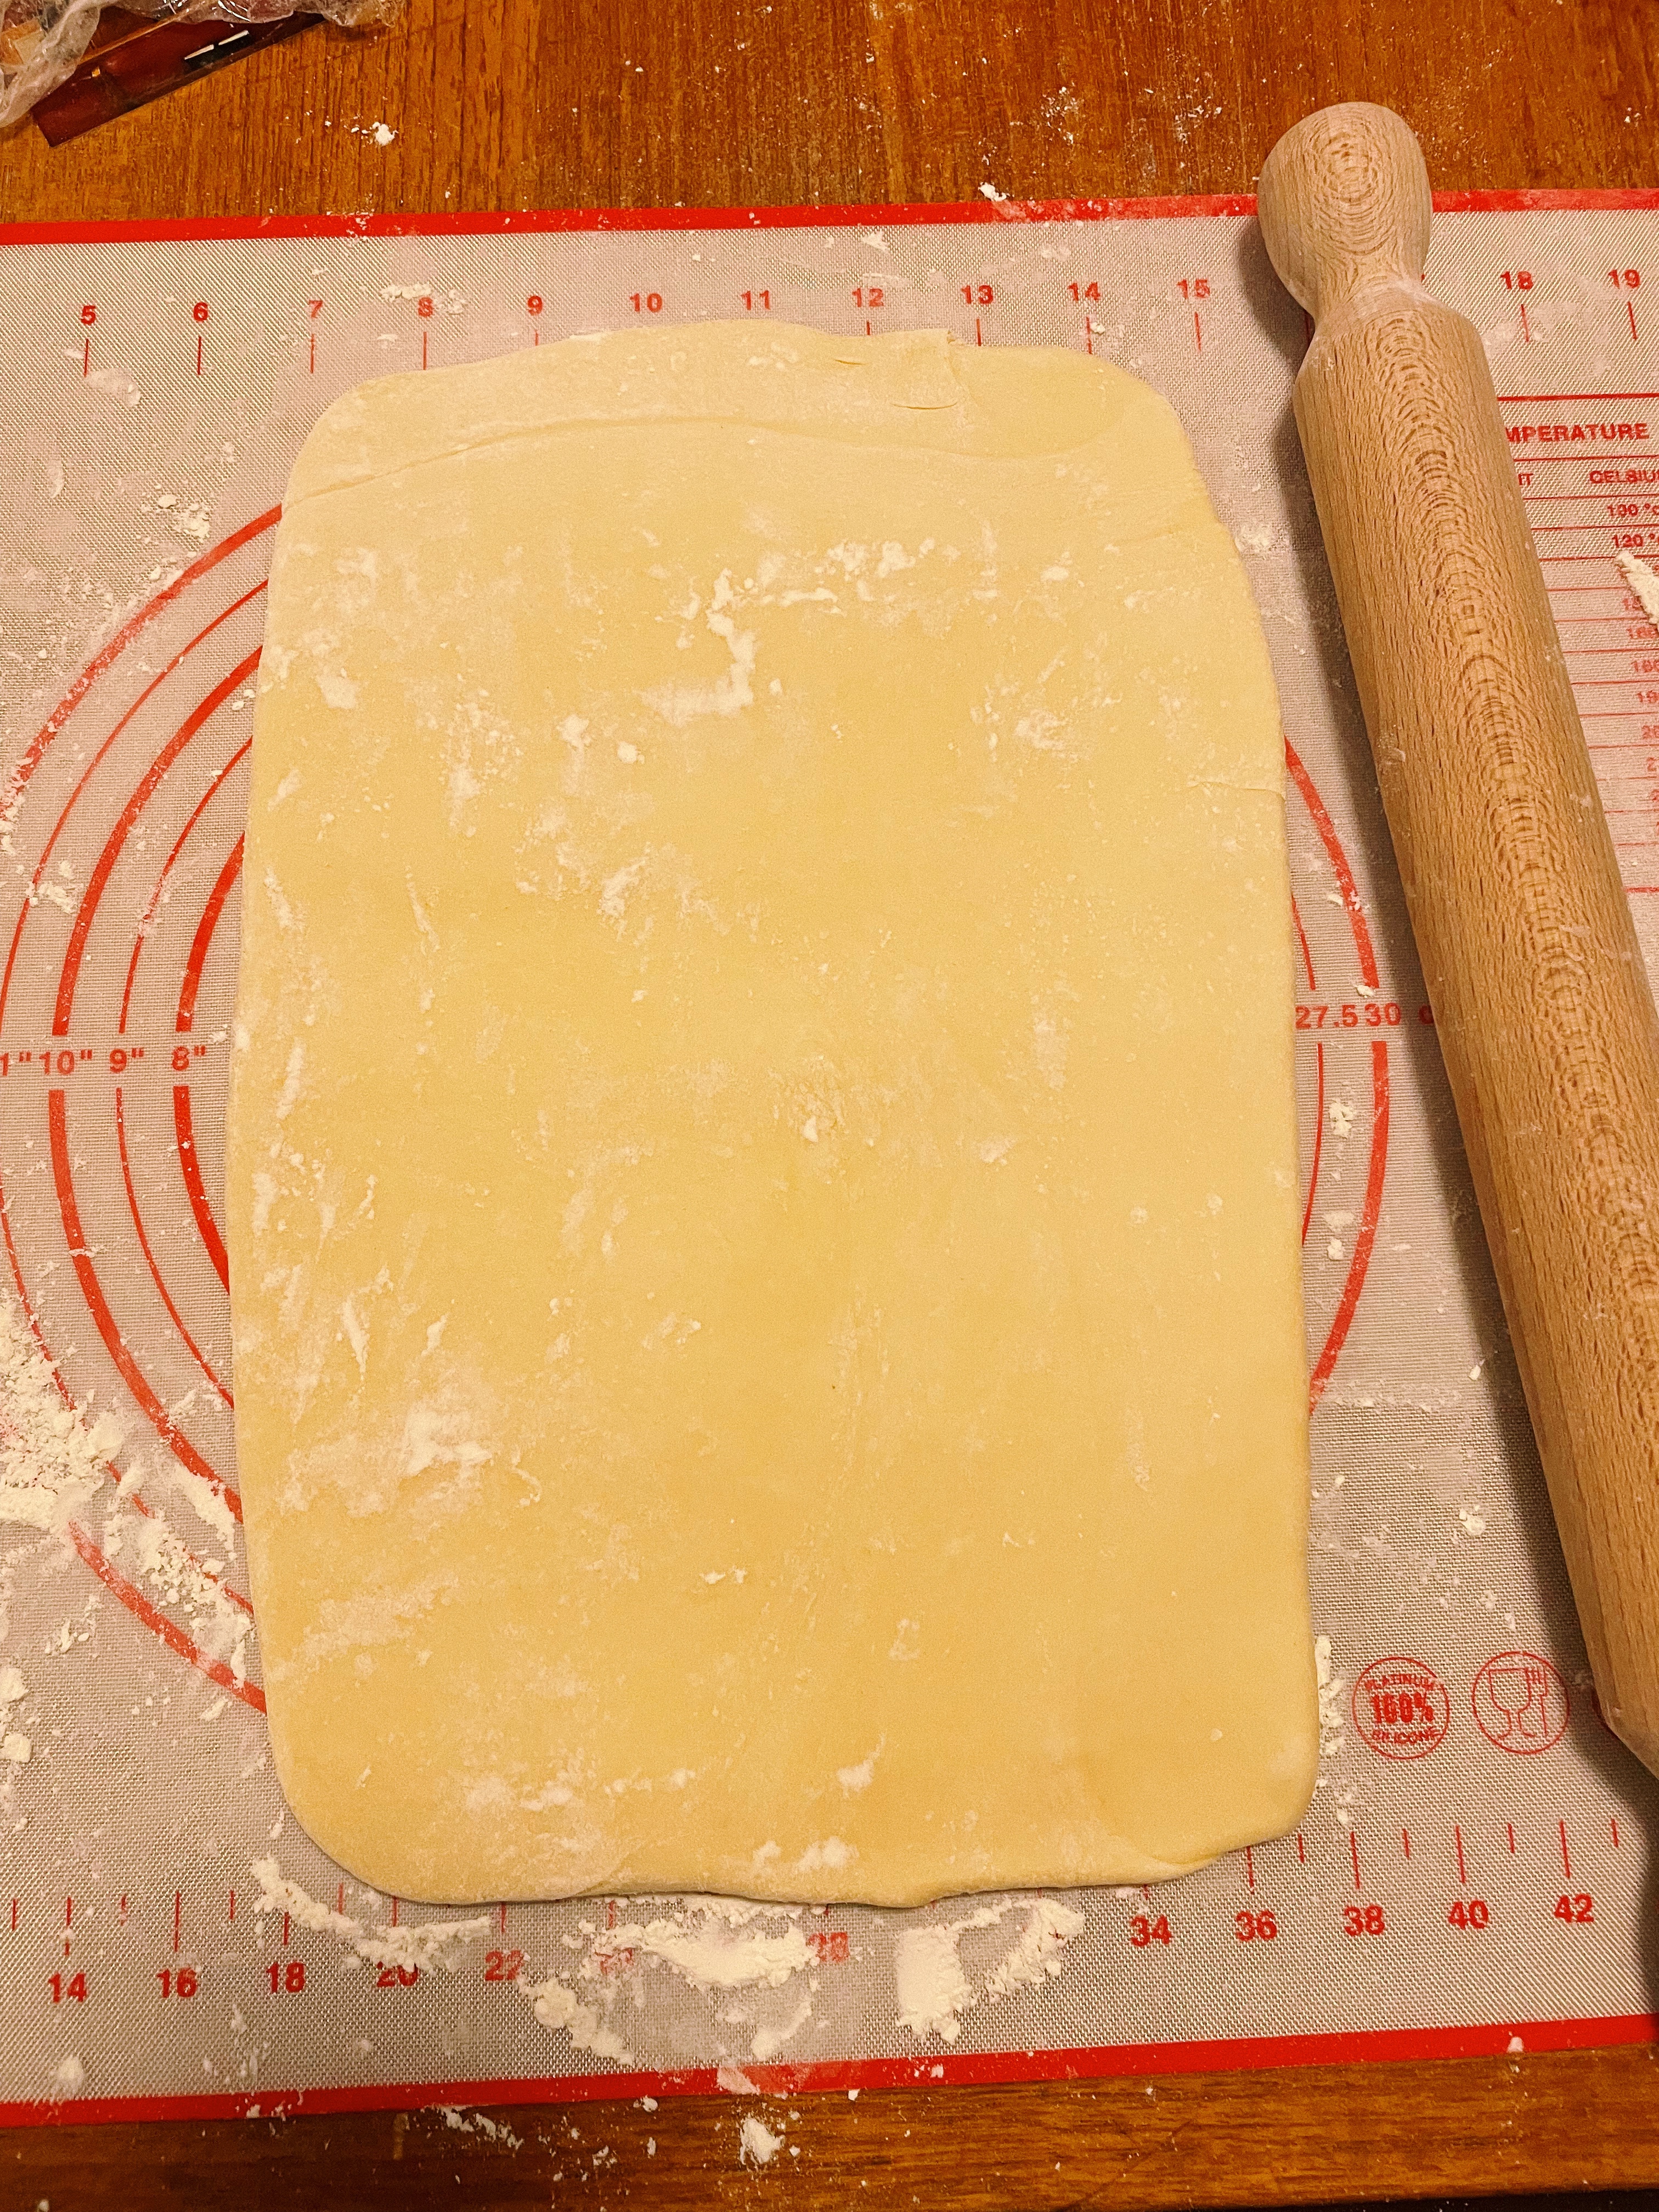
The video was a really helpful guide for the next part of the process of wrapping the butter block in the flour block and doing what I realized in hindsight, was laminating dough, which was pretty dang cool. I found the process of lamination pretty intimidating (which is why I never tried making croissants) but actually doing it made me realize that it was much easier than I thought it would be. I called it a day after rolling out the dough to a 8″ x 12′ rectangle and laid the dough on a small halfsheet to chill in the fridge overnight.

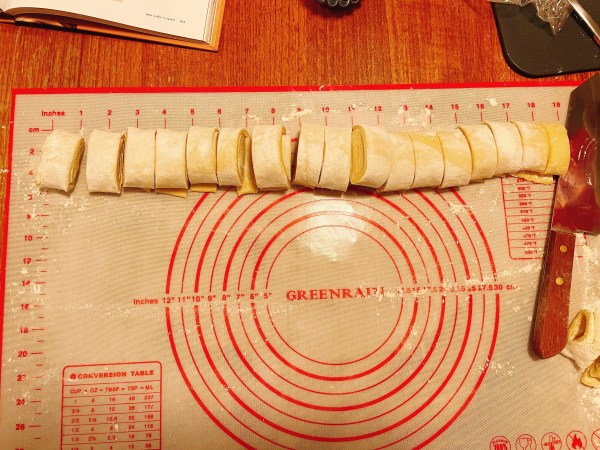
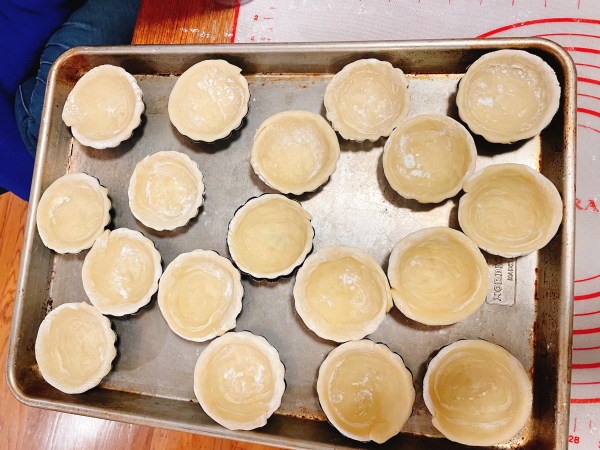
The next day (Weds), I noticed that the saran wrap only partially covered the dough so it was a bit of concern for me when I saw that the uncovered corner of the dough seemed dry and cracky. This emphasized the importance of covering your dough in saran wrap thoroughly so it doesn’t dry out. Nevertheless, I pressed on. On my silicon baking mat, I rolled up the dough into a log and cut it into 18 equal pieces, which was very easy to measure when the mat comes with a ruler measure. I then got into pressing the pieces of dough into each of the silicon molds, making sure to press down on the bottom, then towards the sides. I wanted to make sure there was enough room to put some filling inside and not have it 80% dough with 20% filling. After making 18 of these little tart pans (it was very good hindsight of me to buy 12 more tart pans so I can just mold all the tarts in one go), I put these tart shells to chill in the fridge overnight again.
Baking and Assembling the Tarts
After I finished molding the tart shells, I made short work of making the filling, which was very similar to pastry cream, except it didn’t involve flour and I didn’t have to cook it to a thick paste-like consistency. After combining the ingredients, I also left that filling in the fridge to chill overnight. It smelled very cinnamon-y, maybe a tad too much for me.

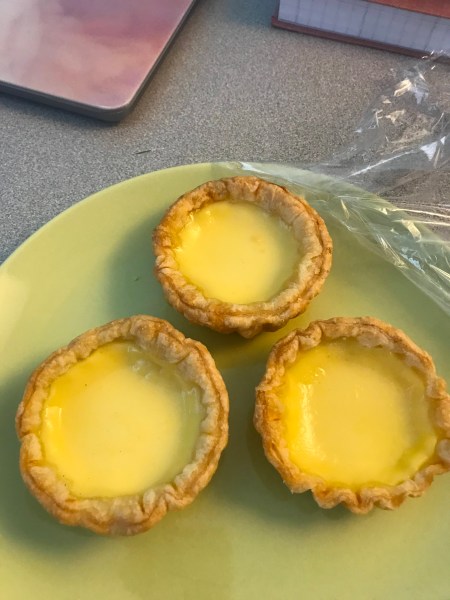
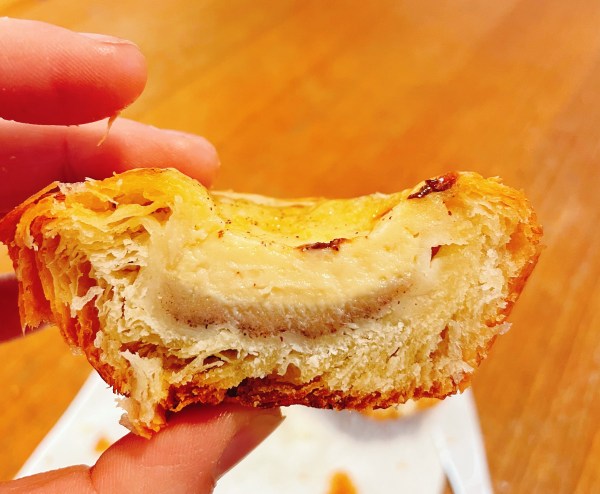
The next day, I gave the filling a bit of a stir and ladled in the filling in each of the tarts to the 1/4″ point below the height of the tart walls. I baked these in two batches, dividing each batch with 9 tarts at 500F for roughly 16 minutes. As it baked, I noticed that the filling puffed up. Though as it cooled, the filling slowly settled back down into the tart shell. It smelled fantastic! I also saw that some spots on the tart shell at the edges browned faster than others, which I didn’t really have an explanation for. Perhaps, it could have been some hot spots in the oven but it was definitely a bit perplexing. If I compared to the reference photo in the book, the tops of the tart edges didn’t display those layers of flakiness.

However, the cross section is pretty satisfying, seeing all the flaky layers made more apparent. It was a bit weird to see something settle at the bottom in the filling, which I have a feeling was the cinnamon. As the filling settles, it naturally separates and I guess the cinnamon was the heaviest part.
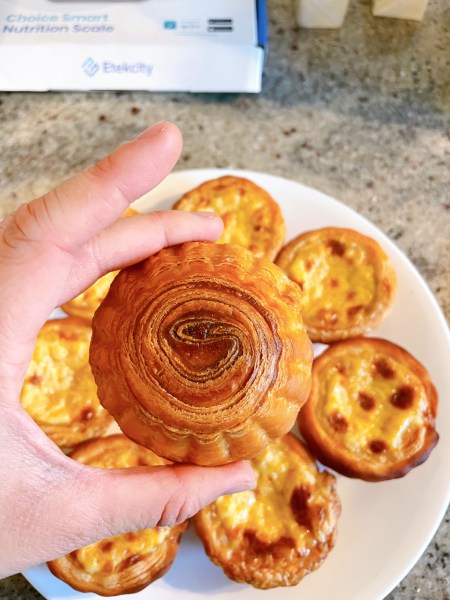
Nevertheless, I thought they looked good. They were definitely the highest-effort item of the three things I baked for this box.
In terms of taste, it turned out pretty solid. I thought it tasted a tad too cinnamon-y so I would probably add less. I also wanted the tart shell to taste a tad bit more, which was drowned out by the cinnamon-y filling. The layers were there but the taste could’ve come out more, had I added more salt to it.
Overall, I was pretty satisfied with how it turned out!
Assembling the Box and Some Final Thoughts

This is what the final box ended up looking like—oolong sugar cookies, matcha strawberry cookies, and egg tarts altogether. In total, I made 6 boxes—each for the older couples who put a lot of work in leading and guiding our youth ministry group in SJ this past year as well as some old leaders who left a strong impact on me. I was really happy that I was able to finish and deliver this before the weekend of a church retreat.
Maybe this time, it was a little different since I was trying something new with the clearer end goal of loving other people. It gave me the chance to think and express appreciation for how these people showed me love this past year. Last week, I hit an emotional low and felt pretty alone and cynical towards God, where I didn’t want to be around people, let alone go to retreat. I’m glad that I followed through with this because it helped me to see and recognize how rich the relational tapestry God weaved me into actually was and continues to be. I’ve been fortunate to be loved by so many people in my life. That was a truth I really appreciated being reminded of when I didn’t feel that way.

Leave a comment