It’s been a bit of awhile since I’ve last updated. For a short update of things, summer has been in full swing for youth ministry, I’ve moved, and recently came back from a church retreat and some peer hangouts. It feels like June and July just flew by. Recently, a friend, decided to move to SD so she had a farewell party with her ministry group and any peers (which is where I came in). In honor of her Cantonese heritage, I decided to make steamed milk pudding, using a mix of recipes from this (Woks of Life) and this to bring to her farewell dessert potluck.
This was also a great way to have an excuse to get rid of the excess glass jars in my house, but shhhh. My friend doesn’t need to know that.
Another name for this is shuang pei nai, which I can’t pronounce because I don’t know Chinese, but it directly translates to “double skin milk.” If done correctly, this dessert is a type of milk custard with a milk skin on top.
Wait, why do you want the milk skin?
Recipes that usually involve heating milk on a stove have some sort of tip where they tell you to “stir the milk occasionally to prevent a film from forming”. It seems from that it is generally undesirable to have a milk skin.
But here, I want the milk skin. In this case, the milk skin apparently tastes very good and may be nutritious for some. I personally cannot attest to this since I never voluntarily tried to let a milk skin form on purpose.
How does this milk skin form?
Milk curdles at high temperatures as water evaporates off, this gives a chance for proteins and fats in the milk to coagulate together to form a skin on top.
I vaguely remember this mechanism playing a part when it came to cheese formation…which led me down the rabbit hole of how cheese is made but I’ll spare the details here since I’m not making cheese here.
Making the Thing
Luckily, the ingredients for this recipe are very minimal:
- Milk
- Egg-whites
- Sugar
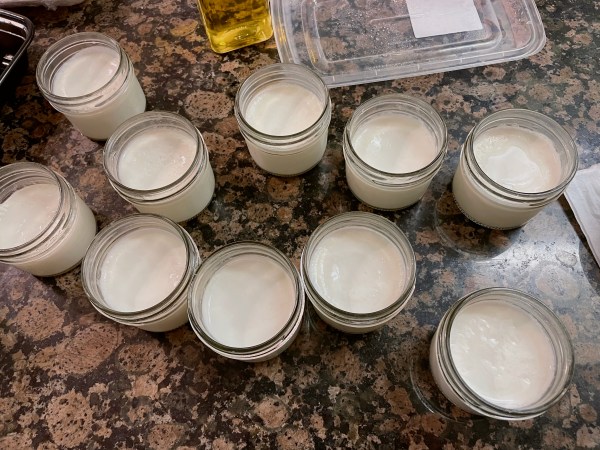
That’s it. I spent a grand total of $5 to make 12 jars of pudding. Most cost-efficient deal.
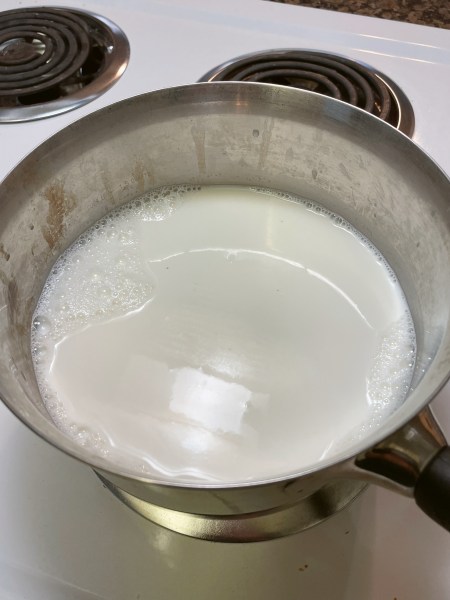
The first step was to heat up the milk until bubbles form. Then, I poured it into the jars and wait for them to cool down to form the first “milk skin.”
While this worked for some of the jars, others failed to show a milk skin after about a 20-minute cooling period. My theory was that there were too many small bubbles in the heated milk so that skin never had the chance to form or maybe I agitated it too much.
I should’ve strained this mixture to get rid of the bubbles prior to pouring these into jars.
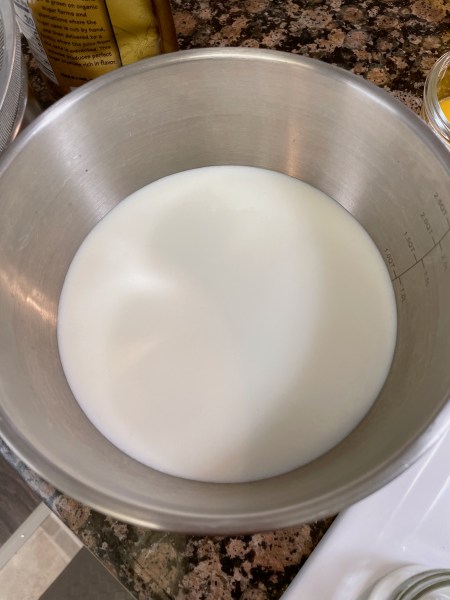
The video depicted carefully decanting heated milk back into a bowl and leaving the milk skin. Because I had about 12 of these jars and I was impatient and most of these didn’t form a milk skin, I poured everything back into a bowl without much care.
Screw it, forget the milk skin business. I made my peace that this recipe was already not going smoothly and moved on.
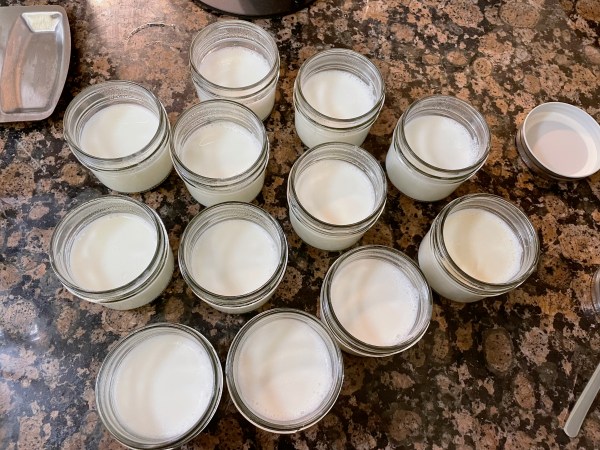
In a separate bowl, I whisked 2 tbsp of sugar with 4 egg whites until the mixture became foamy and then added it to the milk, whisking further until well-combined. I then strained the mixture to separate out any cooked egg-white bits before pouring the mixture back into the jars.
The trickiest part was figuring out how much time was needed to steam this jars. Calculating that this was less liquid I was working with, versus what was shown in the video or recipe but less surface area for steam exposure, I decided to stick with the timing mentioned in the recipe. I steamed the jars at medium heat at 20 min then turned off the heat and let sit for 20 min.
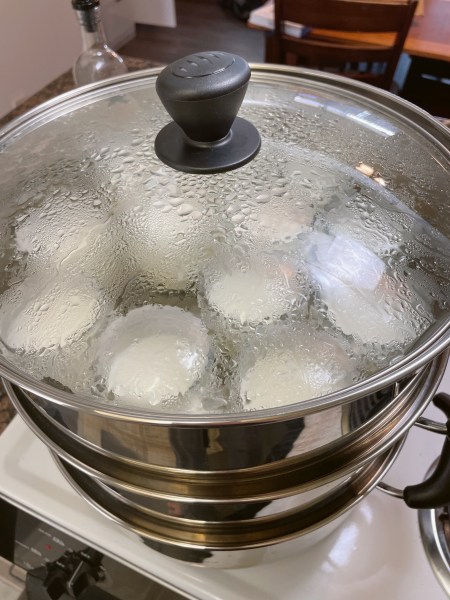
Initially, it looked very jiggly and not very set and I wasn’t sure how solidified it was. I was assuming that I was looking for a consistency similar to creme brûlée but thought that the pudding jars looked too soft/liquid-y in comparison. I checked the consistency with a spoon and found that it was surprisingly more solid than I expected.
However, out of paranoia, I decided to steam it for an additional 10 min and let it sit for another 30 min. This led to some jars being over-steamed where the texture was much firmer than I preferred.
In hindsight, I should’ve steamed it for 25 minutes and let it sit for 30 min. I think I was a tad notch under-steamed the first time I checked the pudding but steaming it for an additional ten minutes took the texture overboard.
Aish.
Anyway, so came to decorating section. A.k.a the part where I tried to cover up how ugly my desserts turn out with distraction.
I used a small melon baller to deposit small balls of red bean paste and added some leftover strawberry slices I found in the fridge from DT breakfast.
The end result was not bad!

Since I was making exactly 12 jars, I didn’t actually taste test these super thoroughly, other than some minuscule portions I swiped from the edges from these jars. I thought that the edges of the milk pudding tasted great. The taste was creamy, not eggy, and not super sweet. It turned out pretty good, despite the failure of no milk skin forming.
If I were to repeat this (which I might based on how cheap this was to make), for the sake of time and convenience, forgo the tedious milk skin formation step and go straight into mixing the heated milk with the sugar-egg white mixture, treating this process like how I make custard. Strain that mixture, then add that to the jars. Then steam it for 25 min on medium heat and 25 min rest in the steamer. Trust that the milk pudding may look liquid-y but it is enough time for it to steam.
Maybe I’ll try the milk skin step again when I’m not making 12 individual servings of this.

Leave a comment