For Christmas dessert, I wanted something to complement the pork-based main dish and decided to try out making Claire Saffitz’s tarte tatin, which was taken out from her book, Dessert Person, and was also demonstrated in one of her videos here.
Because this was only a family of four, I decided to scale down this recipe and use it as an excuse to finally break in the 6-inch cast iron that I impulsively bought during Prime Day.
What is Tarte Tatin?
Legend has it that this was a recipe was an accidental creation by the Tatin sisters, who brought it into existence in an effort to save a botched apple pie. It is said that one of them was making an apple pie and, in her absentminded-ness, had forgotten to place the crust in the apple pie first before the filling. Her saving grace was to place the crust over the filling and bake it that way. This unexpectedly became a hit and the namesake dessert stuck around.
Tarte tatin is a French dessert of caramelized apples baked in a cast iron skillet under a cover of puff pastry dough, that is then served inverted, hence the glossy apple appearance.
It has a bit of a reputation for being a bit finicky, probably with the part of dealing with hot caramel and inverting a hot piece of cast iron. However, I did not feel too bad going into this.
Making It
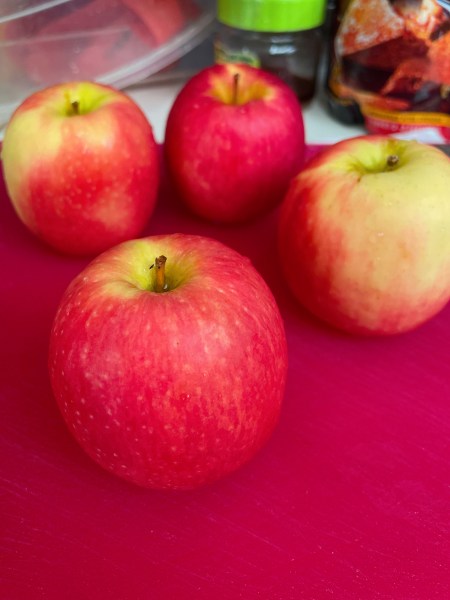
Claire Saffitz asked for crisp, firm apples, recommending Pink Lady apples. For a 6-inch skillet, I ended up using around 6 small apples. I cut off the tops and bottoms and peeled each of them before cutting them half and scooping/cutting out their core. I stood them up in the skillet before pouring in a little over half of the listed amount of apple juice (instead of brandy), maple syrup, and apple cider vinegar with a pinch of salt. I sealed it under foil and left it to bake at 275F.
Something that I was paranoid about was overcooking the apples. I didn’t want it to get overly soft. I thought that cooking a smaller amount would make the apples cook faster but it roughly took the amount of time that Claire mentioned it would–about 1 hour and 15 minutes. The apples were not disintegrating but I could skewer them easily with a chopstick, which was the texture I was looking for. I carefully scooped them out of the skillet with a spatula onto a plate and let them chill in the fridge until I could take them out later.
Next came cooking the juice down to a glaze, which was just cooking it until it reduced to roughly 1/3 to 1/4 of its original volume, taking about five minutes. Though it looked too liquidy at first to be used as a glaze, I quickly realized that it could harden as it cooled and became a bit of a sticky mess to pour into a bowl. Cleaning it became a bit of an ordeal but with enough hot water and wipes with some paper towels, I was able to wipe down the cast iron for the next step–making the dry caramel.
How Caramel Works
Caramel was always a bit finicky to me. A few years ago, a friend and I attempted to make flan one late night with very dubious results, where the sugar ended up melting then recrystallizing, never reaching the liquid form that we thought it would. A mixture of us being clueless and also us being tired and mesmerized by watching sugar cook in a pot in the same way someone might be spaced out watching a washing machine at work, we never quite figured out why it didn’t work, other than “something something sugar don’t work that way.”
I have a strange sense of deja vu that I’ve talked about this topic before but I can’t recall when.
I briefly touched on this when talking about the “caramelization” of white chocolate. For a brief refresher, caramelization, not to be confused with the Maillard reaction, is a type of non-enzymatic browning that involves the thermal decomposition (pyrolysis) of sugars, specifically sucrose (C12H22O11), the chemical name of granulated sugar, into more simple sugars, such as fructose and glucose (which leads to the liquid look). As these sugars are broken down, it allows for the formation of new flavor compounds to form that are associated with the “caramel” flavor, such as caramelan and caramelin. Other compounds also include diacetyl ( 2,3-butanedione) (which produces the butterscotch flavor), furan (nutty flavor), maltol (toasted flavor).

This process doesn’t seem to be well-documented, as there are many things unclear about it but I did my best to proviude the most straightforward explanation. Sources that I’ve used for the above could be found here, here, and here.
I also learned that it is best to let sugar melt on its own and not stir, for it encourages crystal formation. As sugar breaks down and melts into liquid, stirring it may encourage those same broken-down crystals to group up, polymerize, and re-crystallize, which may have explained the previous unsuccessful attempt with the flan.
Okay, Back to Making It
Making caramel took much quicker than expected where I had to lower the heat to low to prevent burning it. It was a deep amber brown color and it sputtered a bit when I added apple cider vinegar to it. After leaving that to cool, I got started on the puff pastry.

I could make my own but I realize that I was at that point in my life where I realize the benefits of homemade puff pastry was not that much greater than the benefits of storebought puff pastry. I wasn’t actually able to tell the difference.
Skipping that tedious step of making the puff pastry, I rolled out the pastry and used a 8″ plastic microwave cutter to cut out an appropriately large circle and docked it with a fork.
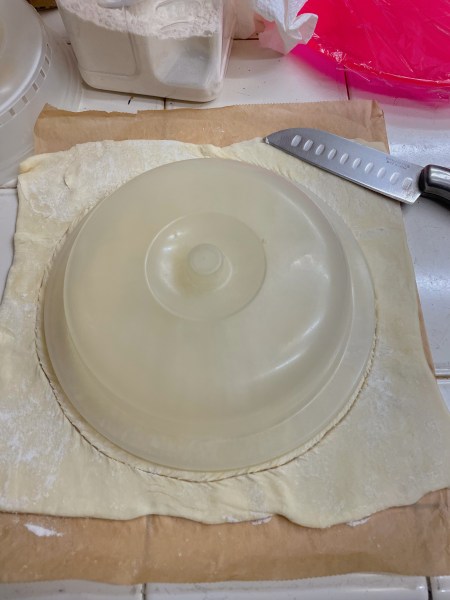
I then laid the apples, round side down, onto the bed of cooled caramel, which felt firm at that point. I then draped over the round of puff pastry and used a spoon to tuck the pastry in between the sides and the cast iron pan.


I then chilled it for 20 minutes and cooked it at 425F for 15 minutes before lowering the temperature down to 350F.
Unfortunately, I was a bit distracted and didn’t hear the timer go off, having it overcooked by ~10 minutes. After letting it cool for another several minutes, I inverted the cast iron onto. a pan.
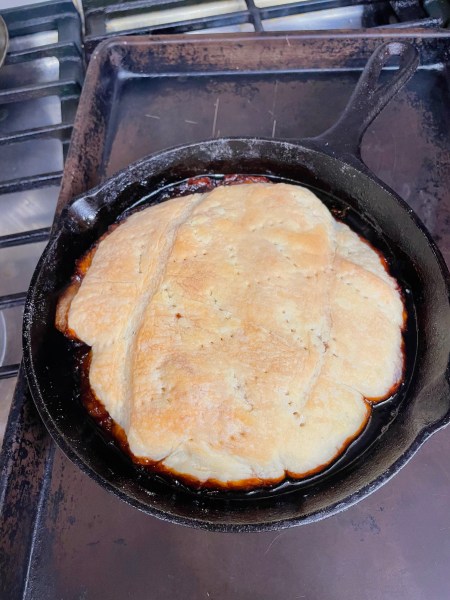

So, the first thing I noticed about this dish was how darkly brown it was.
“It’s burnt,” my mom said.
So, it wasn’t completely burnt but it didn’t taste great either. Vanilla ice cream was definitely required to stomach this down.
The first round of this was not a success. Also I realized that I forgot about the butter, which probably didn’t help.
I repeated this for a second time.
This time, at the caramel step, I kept everything at low heat and added the sugar in increments. I then added the vinegar and almost forgot to add the butter again but did so. Immediately, the mixture seized where the butter ended up separating from the caramel, leaving an oily film on top.
I tried my best to whisk the caramel and butter together and ended up putting it back onto the stove until it recombined, to some degree of success. I then let that cool and proceeded with the same steps as before.
This time, I baked it for closer to 25 minutes at 350F to prevent the burning effect from last time. When I took out the pastry, the caramel was bubbling around the pastry and the top of the pastry appeared barely golden brown. Knowing of my tendency to overcook things, I figured that I was safer barely undercooking it than overcooking things.
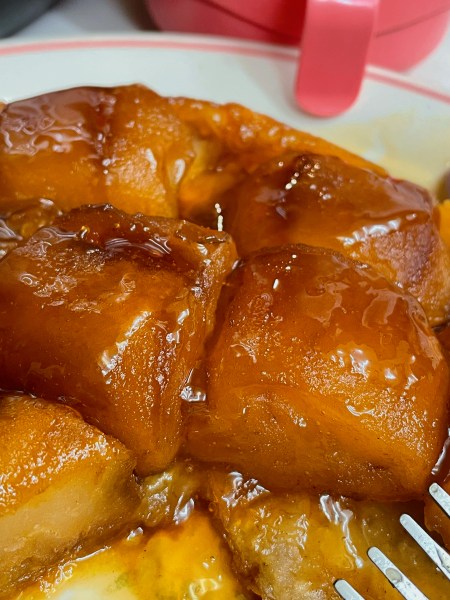
However, when I inverted it, thank God I followed Claire’s advice and decided to invert the tarte onto a plate, I did it over the sink. Somehow, my fingers were spared of the hot mess of caramel juice that overflowed and the tarte landed on ths dish, with a part of the crust that still stuck onto the pan, that I scraped off and put back onto the tart. immediately, this looked a better shade of orange-caramel-brown, rather than deep red-brown from the first tarte that I made.
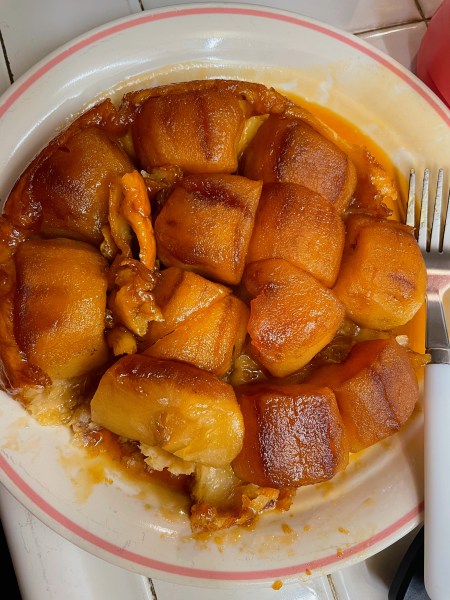
I also forgot to add on the glaze, hence the dull first picture, and only remembered after I started eating a slice. The glaze really makes it look nicer.
Overall, the caramel was the trickiest step about this. Maybe I could have cooked this for a little longer. This tasted like a fancier apple pie with the spices, maybe with less work involved with the puff pastry and peeling/cutting of apples. I think I would have also reduced the amount of sugar needed because it did taste a tad too sweet. Or I would have added more apple cider vinegar to cut through the sweetness. Serving this with vanilla ice cream is definitely a requirement.

Leave a comment